The group is the shared space where you and the other caregivers organize yourselves to look after one person. Everything of theirs lives in here —details, medications, appointments, notes— and, above all, who takes part and what each person can do.
The person being cared for
Look up their details
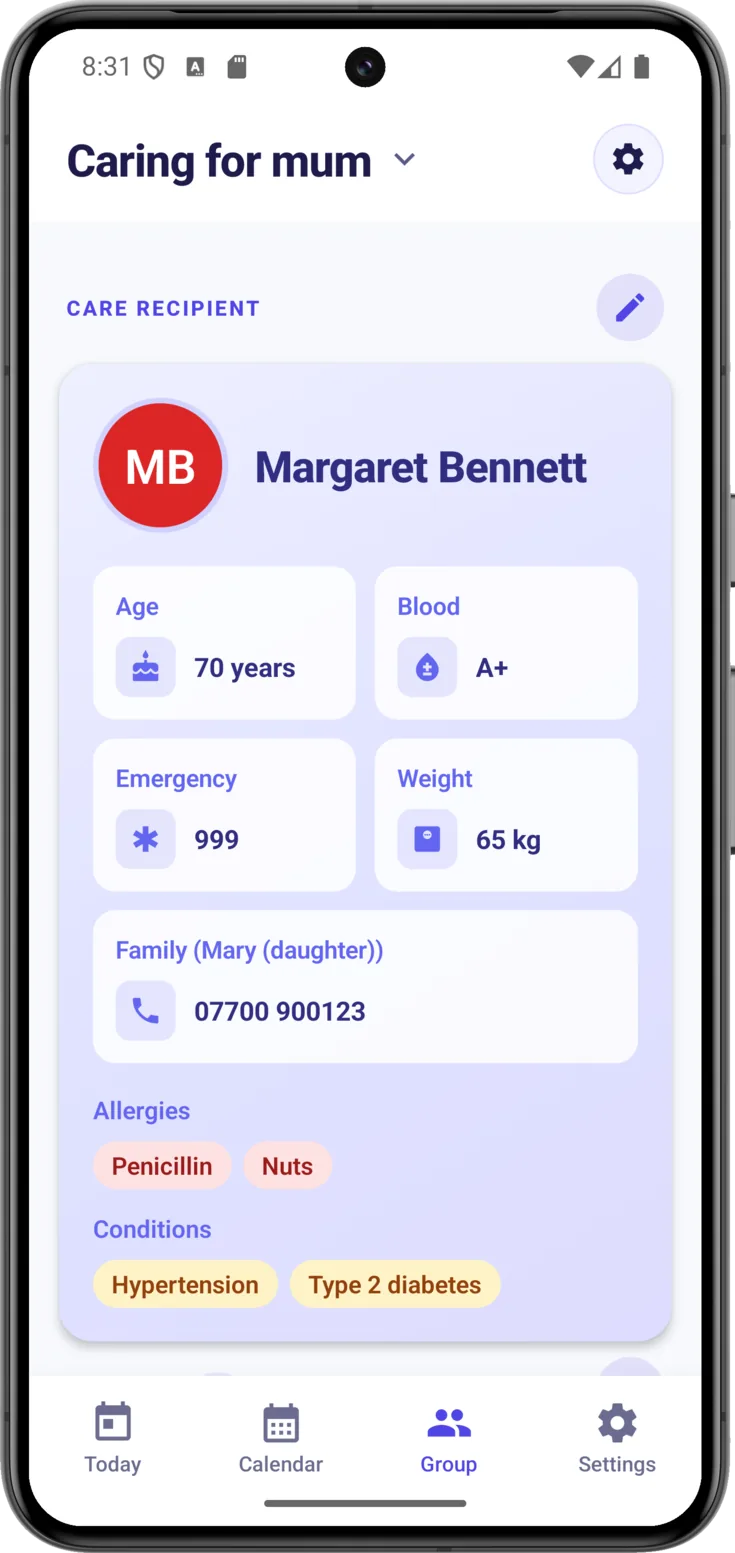
Right at the top is the card with their name, their age and the details that are needed most at a bad moment: blood type, weight, allergies, conditions and the family and emergency phone numbers. Whatever you don’t fill in simply doesn’t appear.
Correct or complete them
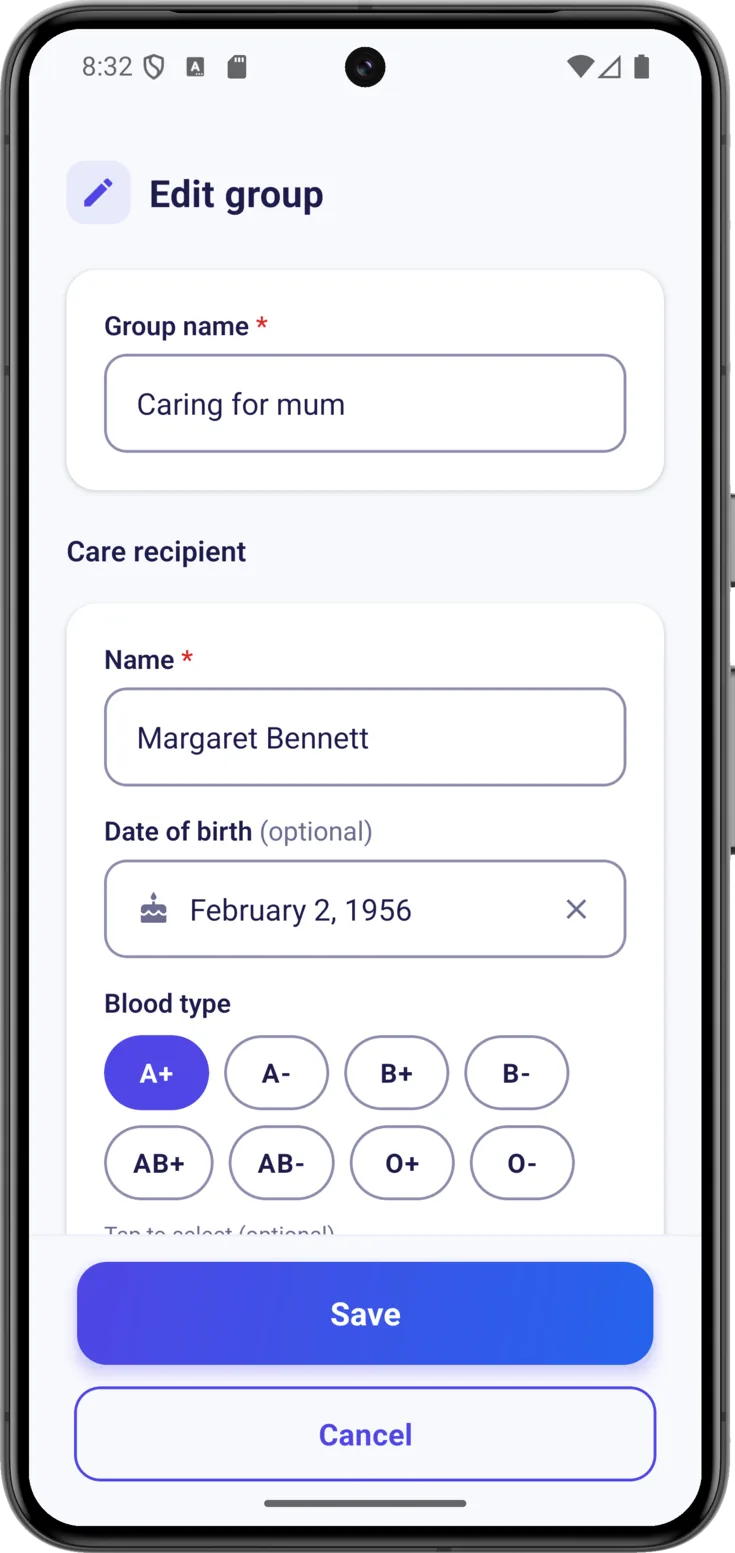
If you are the one organizing the group, tap the edit icon and the same form you filled in when you created it will open. There you correct the details of the person being cared for and also the «Group name», which is the one that appears at the top of the app.
Members and roles
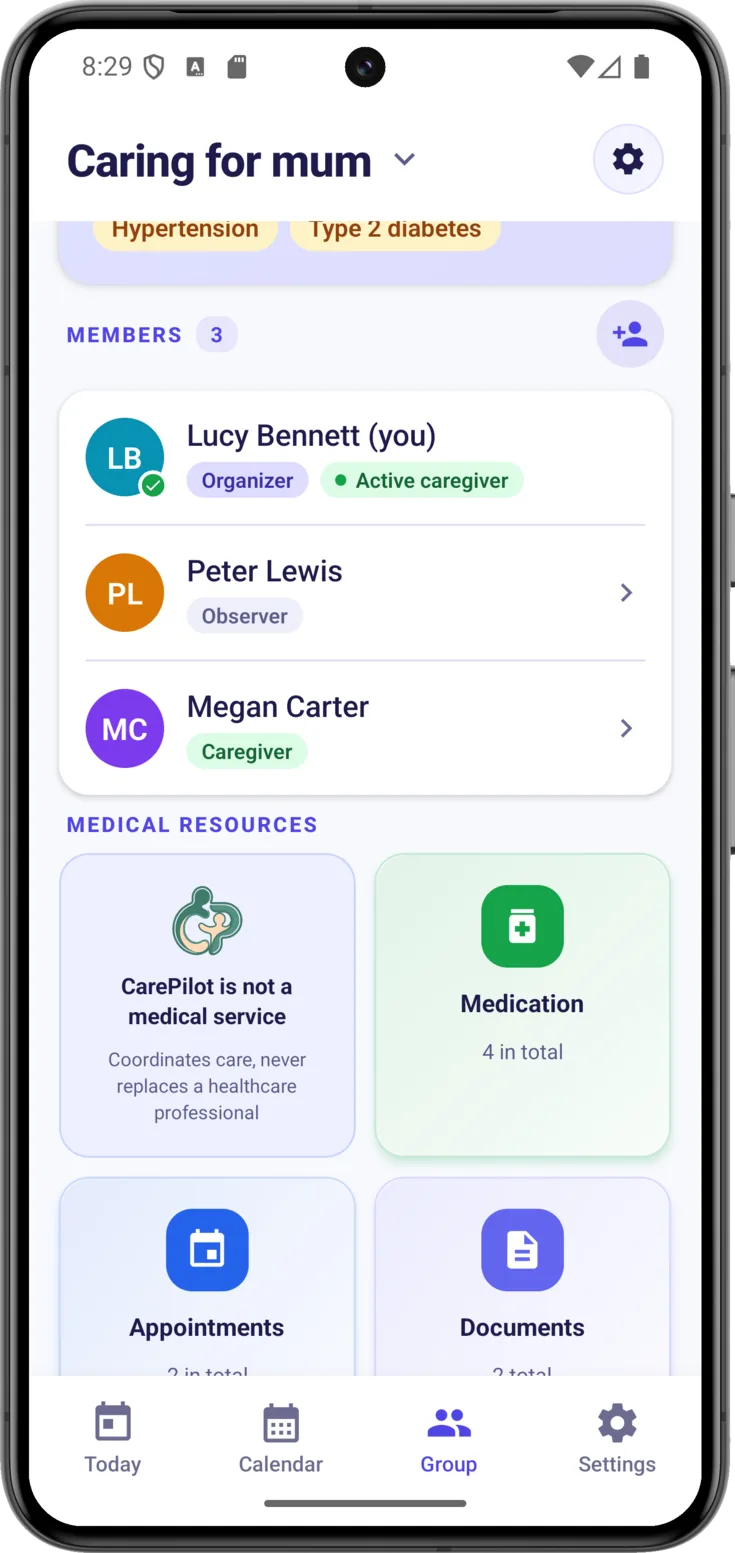
Below, everyone in the group is listed, each one with their avatar, their name —with a «(you)» so that you can pick yourself out— and their role. Whoever is in charge at that moment carries a green check on their avatar and the «Active caregiver» tag next to their role.
The role decides what each person can touch:
- Organizer — whoever created the group. They can do everything, and they are the only one who changes roles or deletes the group. The role cannot be handed over.
- Caregiver — takes part in the day-to-day. To begin with they can mark things as done, take the turn and write notes and expenses; the rest comes switched off on purpose so that you are the one who turns it on.
- Observer — sees everything, touches nothing. It is the role everybody comes in with when they join.
Open a member's profile
If you are the one organizing the group, tap that person in the list to open their role and permissions editor. Your own entry cannot be edited: as the organizer you already have every permission.
Inviting someone
Share the code
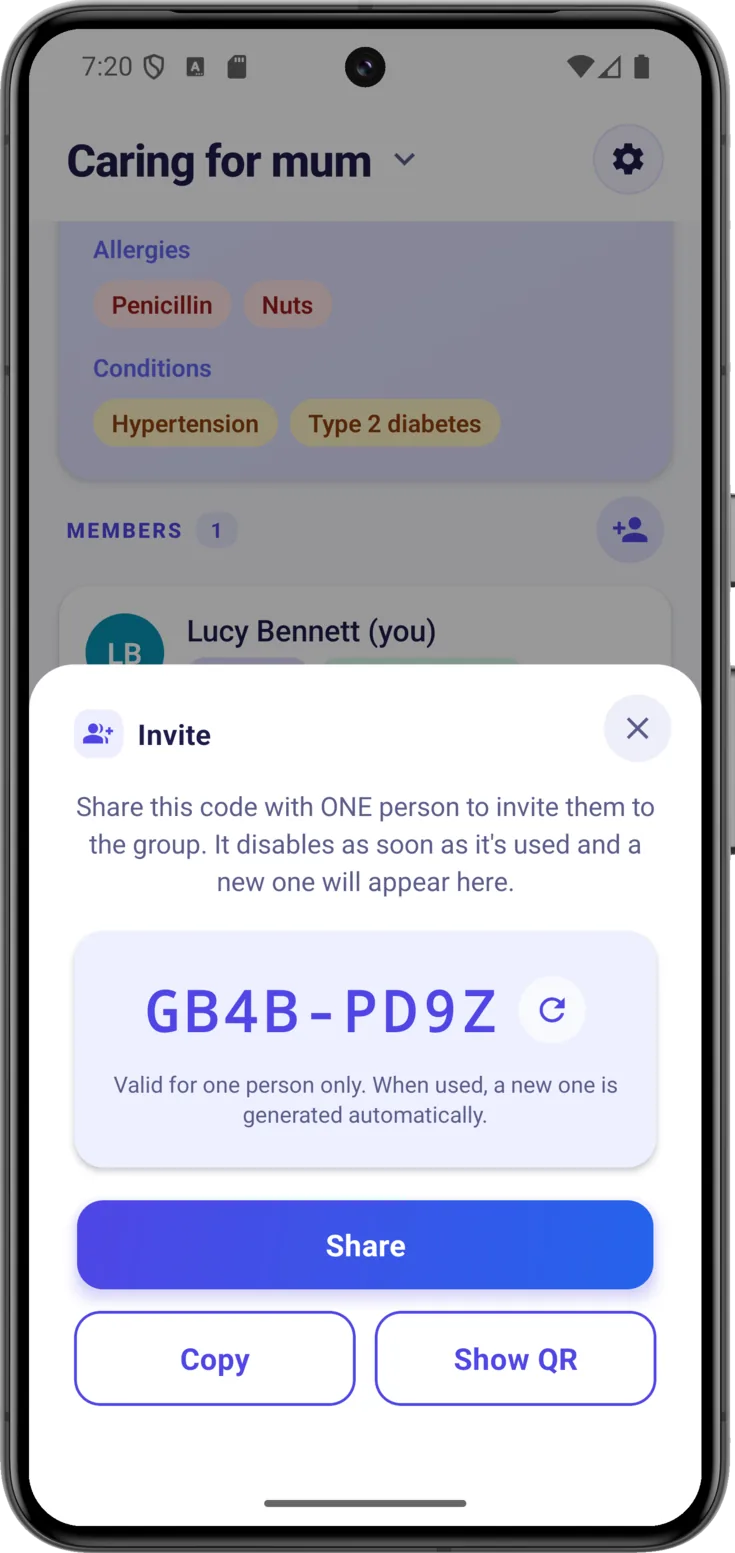
Tap the invite icon and the «Invite» sheet
opens with a code along the lines of ABCD-EFGH. You have three ways of getting it to them:
- Share — opens your phone’s menu (WhatsApp, SMS, email…) with a message already prepared.
- Copy — the code onto the clipboard, to send it your own way.
- Show QR — shows a QR code, that square full of black dots, so they can point their camera at it if they are right next to you. It only works if they already have CarePilot installed: what it does is open the app, not take them to a web page.
How many people fit is decided by the plan of whoever organizes the group: 2 with Free, 6 with Plus and 16 with Pro, counting the person organizing it within that number. With Free, then, there is room for two of you: that person and one more.
When the places run out, whoever tries to come in with the code gets a notice —«This group has no places left. Talk to whoever organises it: they can upgrade their plan or free up a place.»—. It isn’t that the code is wrong: it is that there is no room left. The two ways out are the ones the message itself gives: take out somebody who no longer takes part, or upgrade the plan (Plans and subscriptions).
Each member’s permissions
The role marks a starting point and the permissions fine-tune the detail («let them write down appointments, but not delete anything»). If what each role comes with suits you, there is no need to touch anything.
Choose the role and what they can create
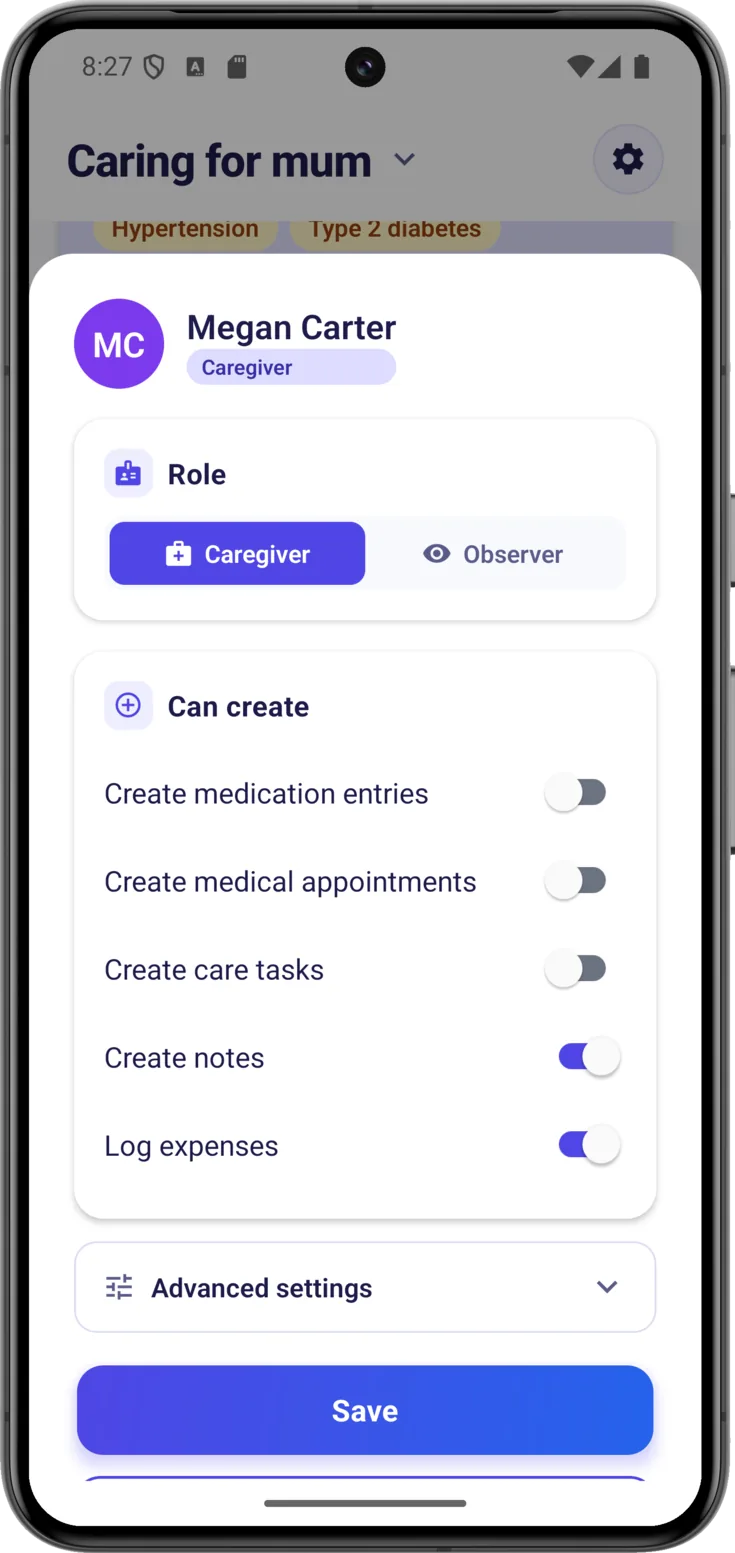
Open that person’s entry by tapping them in the members list and at the top you will see the Caregiver · Observer selector. When you change it, the permissions below readjust themselves on their own to what is usual for that role.
Below, in «Can create», you decide one by one the things they can add: medication, appointments, tasks, notes and expenses.
With Observer there is nothing to adjust
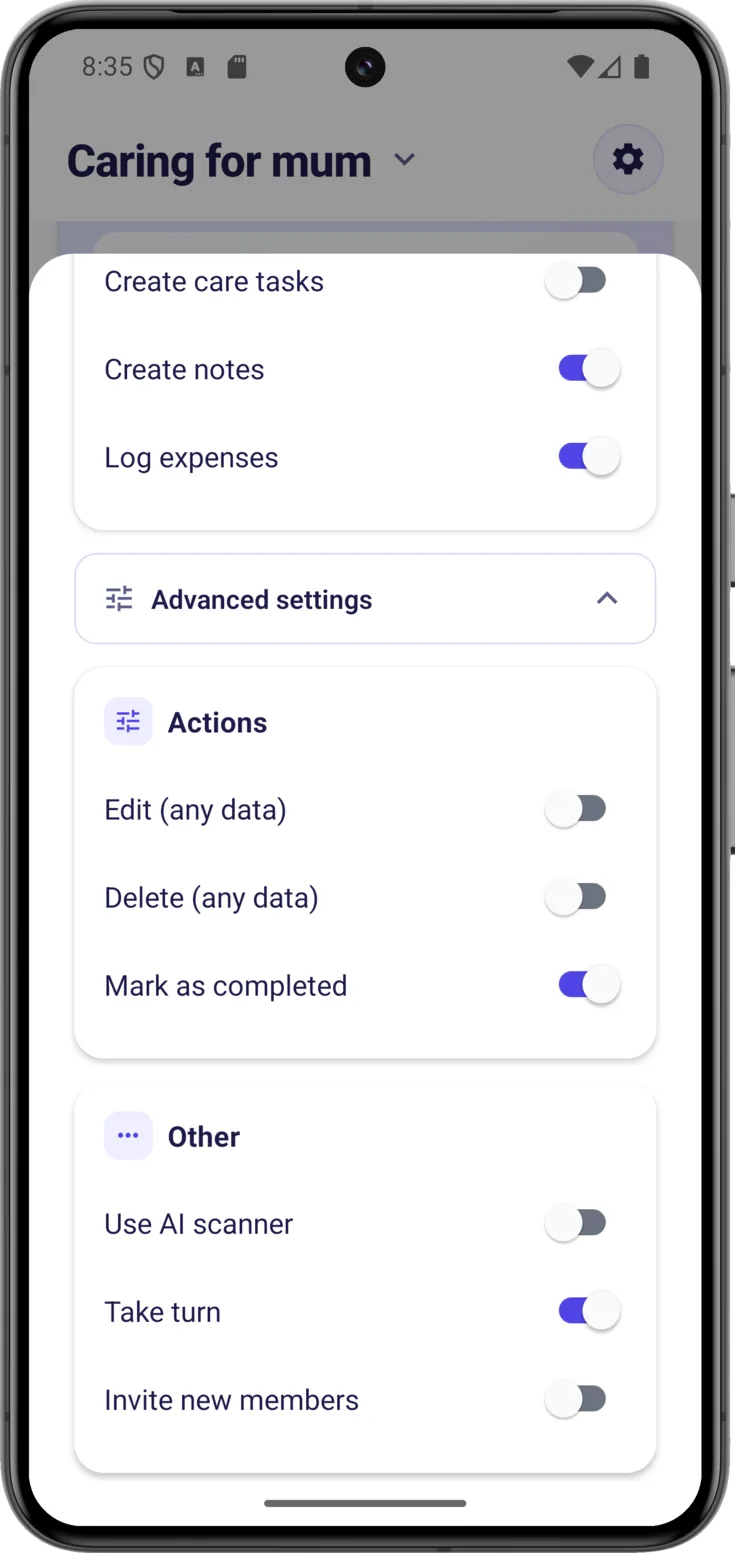
When you choose Observer all the switches disappear: they don’t touch anything, so there is nothing to decide. Go back to Caregiver and they reappear just as they were.
Fine-tune it in «Advanced settings»
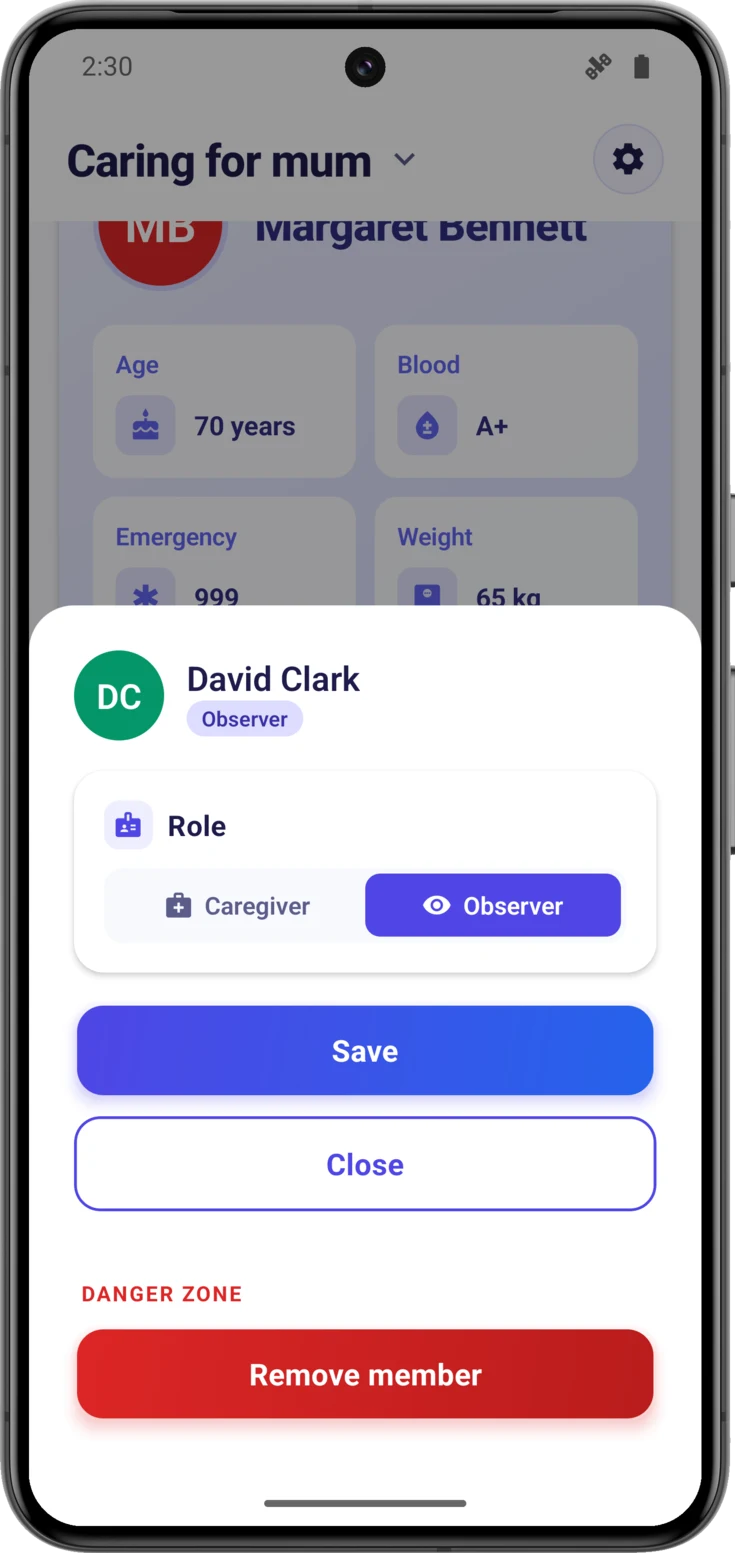
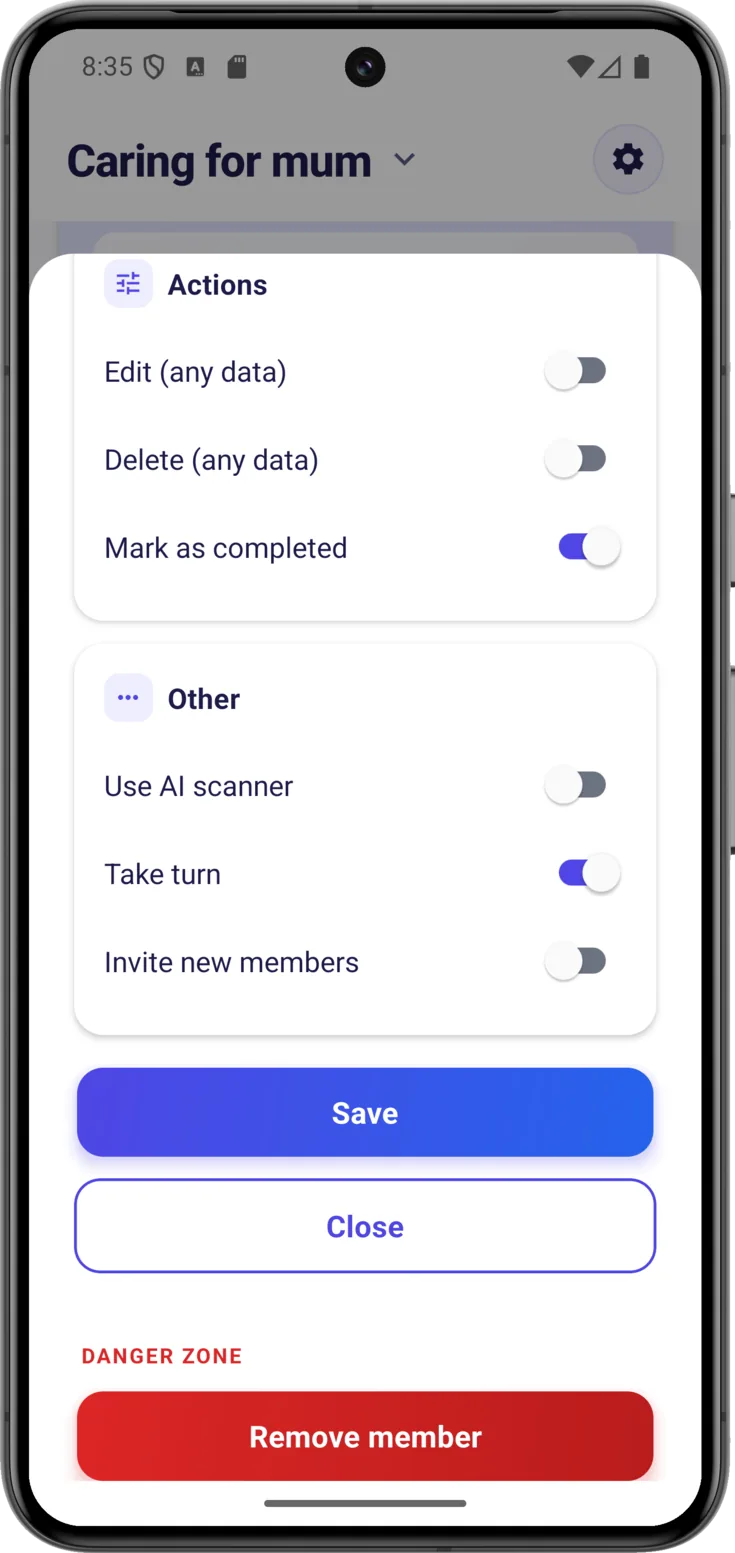
Open up «Advanced settings», just below «Can create», and two more blocks appear. In «Actions» are the strong permissions: «Edit (any data)», «Delete (any data)» and «Mark as completed»; switch the first two on only for somebody you genuinely want to be able to change or delete things in the group.
The «Other» block brings together «Use AI scanner», «Take turn» and «Invite new members».
Save, or take somebody out of the group
Tap save and the changes apply straight away. From here you can also «Remove member»; the app will ask you to confirm first.
The moment you confirm, that person stops seeing the group’s content, photos included, and the reminders for that group stop sounding for them. What does not happen to them is being left out of the app: their session stays open and their other groups carry on where they were. And they find out by themselves, without you having to tell them separately: a card appears saying «You’re no longer part of the group» with the name right after it, and it reaches them with the app open.
What they wrote down while they were taking part stays in the group for those of you who carry on caring. If you have second thoughts, you can invite them back with a new code.
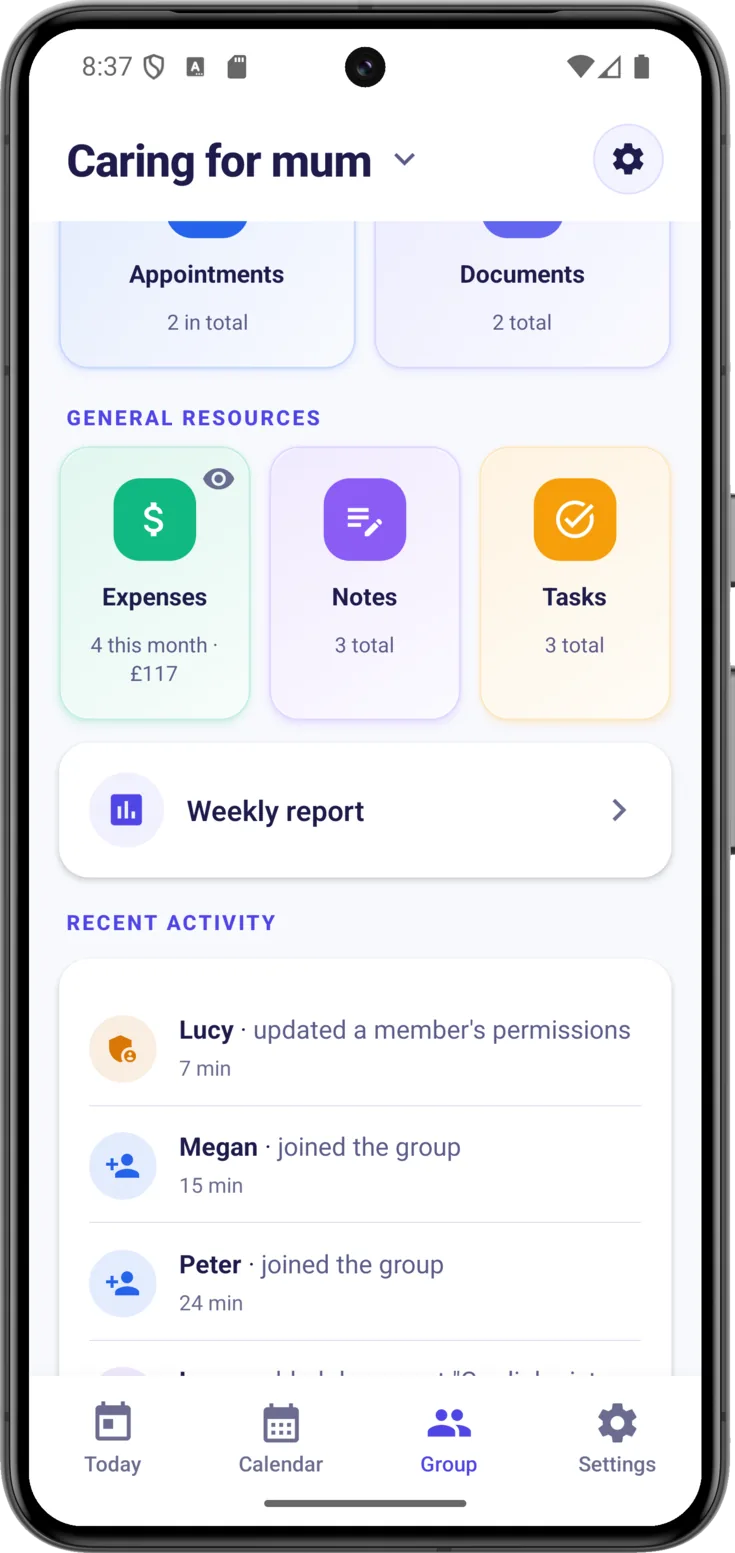
Quick access
Go into each part of the care
The weekly report
See how the week has gone
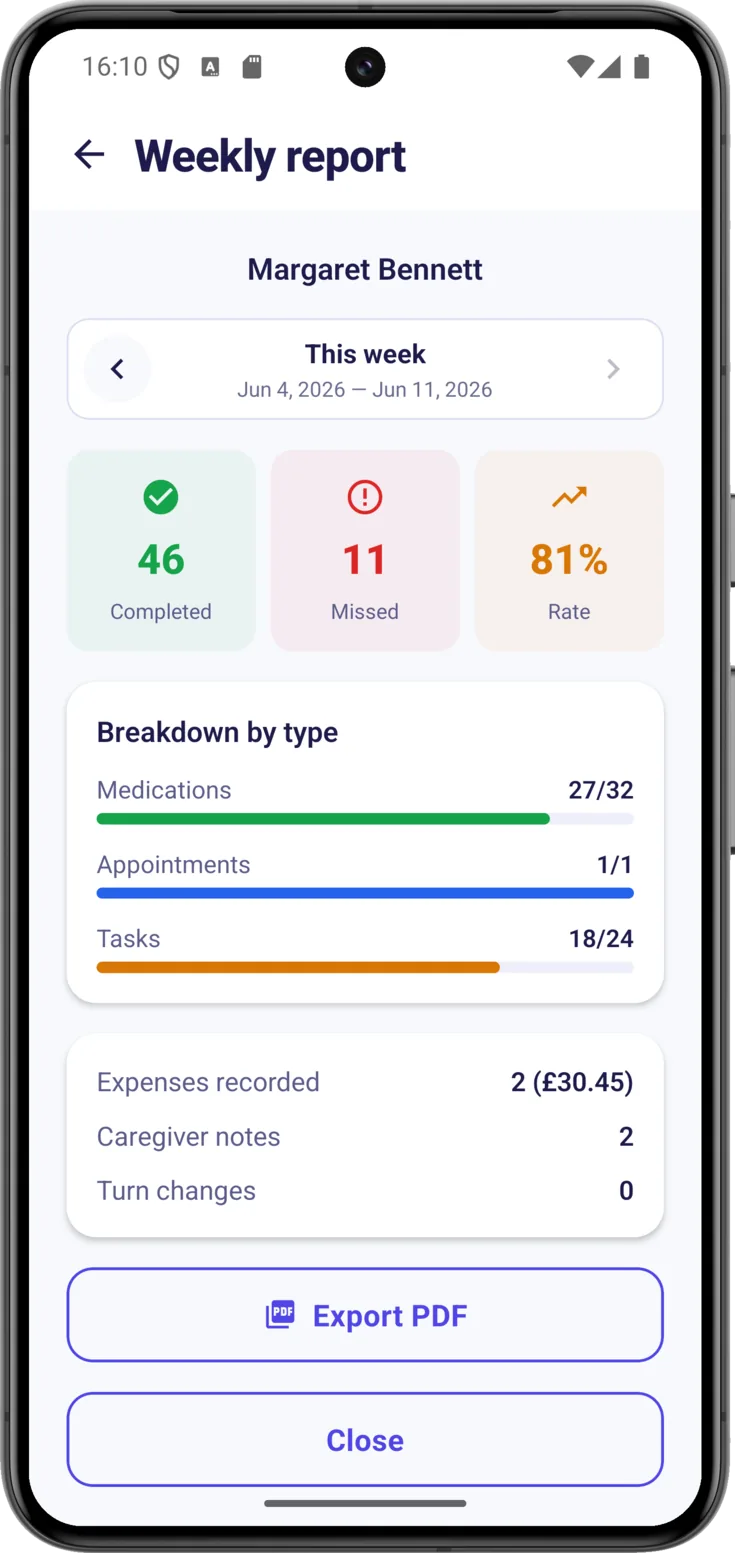
Below the quick access cards, the «Weekly report» sums the week up: how much was completed, how much was left pending, the breakdown by type and the totals for expenses, notes and turns. With the arrows at the top you move to other weeks.
You have it in full detail —including the PDF, which brings the complete day by day— in the Reports guide.
Recent activity
Catch up at a glance
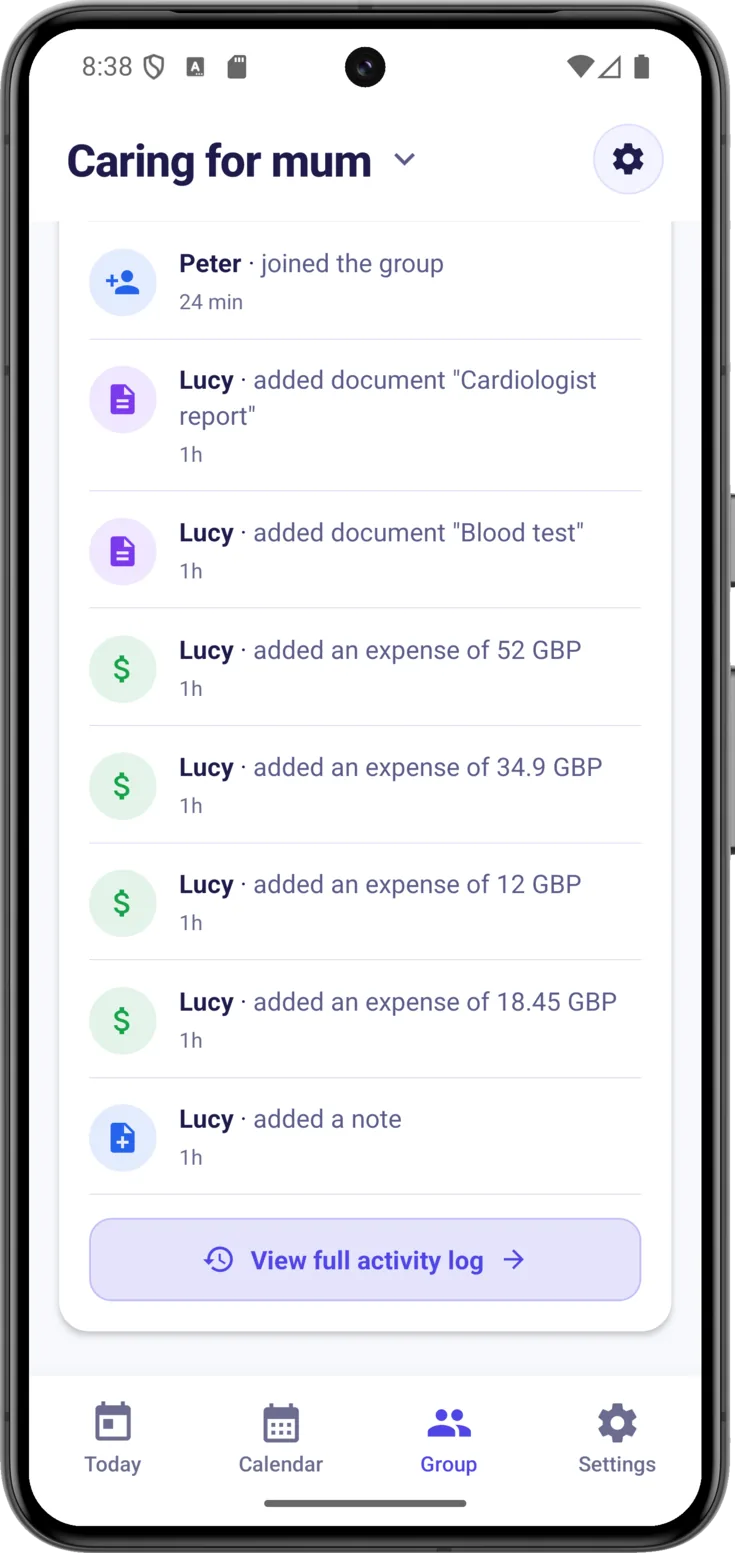
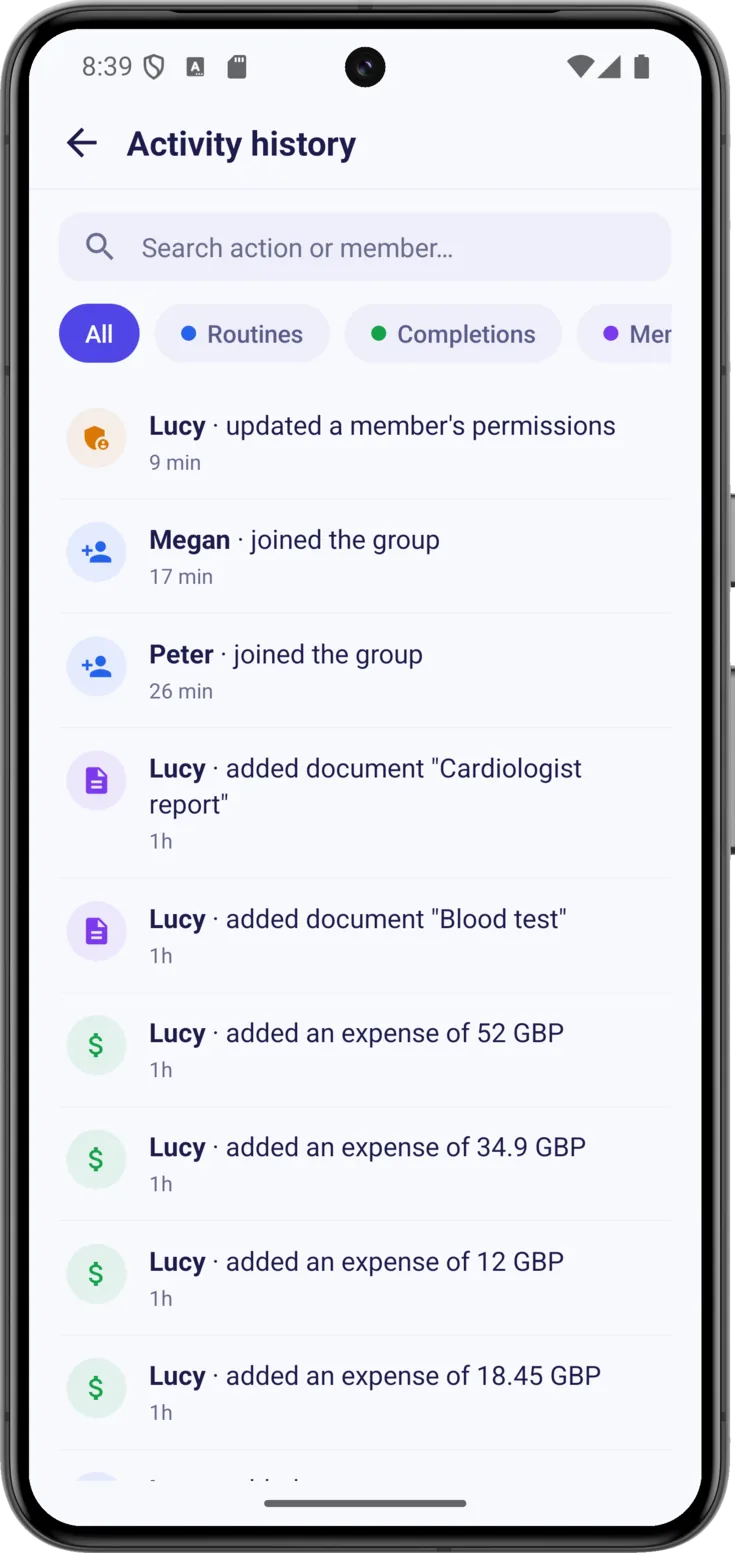
At the end of the screen, each line says who did what —«Emily · passed the shift to Sarah García»— and underneath when: the most recent in minutes, «19 min», and things from days back with the date and the time, «Aug 6 · 12:58 PM».
Some carry an amber tag: «off duty», if it was marked by somebody who was not in charge, or «marked later», if it was written down another day. They are not mistakes, but the two cases where it is worth looking at the entry before relying on it — the Turns guide tells you about it.
Open the full history
With «View full activity log» the group’s whole record opens, with a search box by action or member and filters («All», «Routines», «Completions», «Members»…). They don’t all fit: swipe the row to the right to see the rest.
Go to a particular date
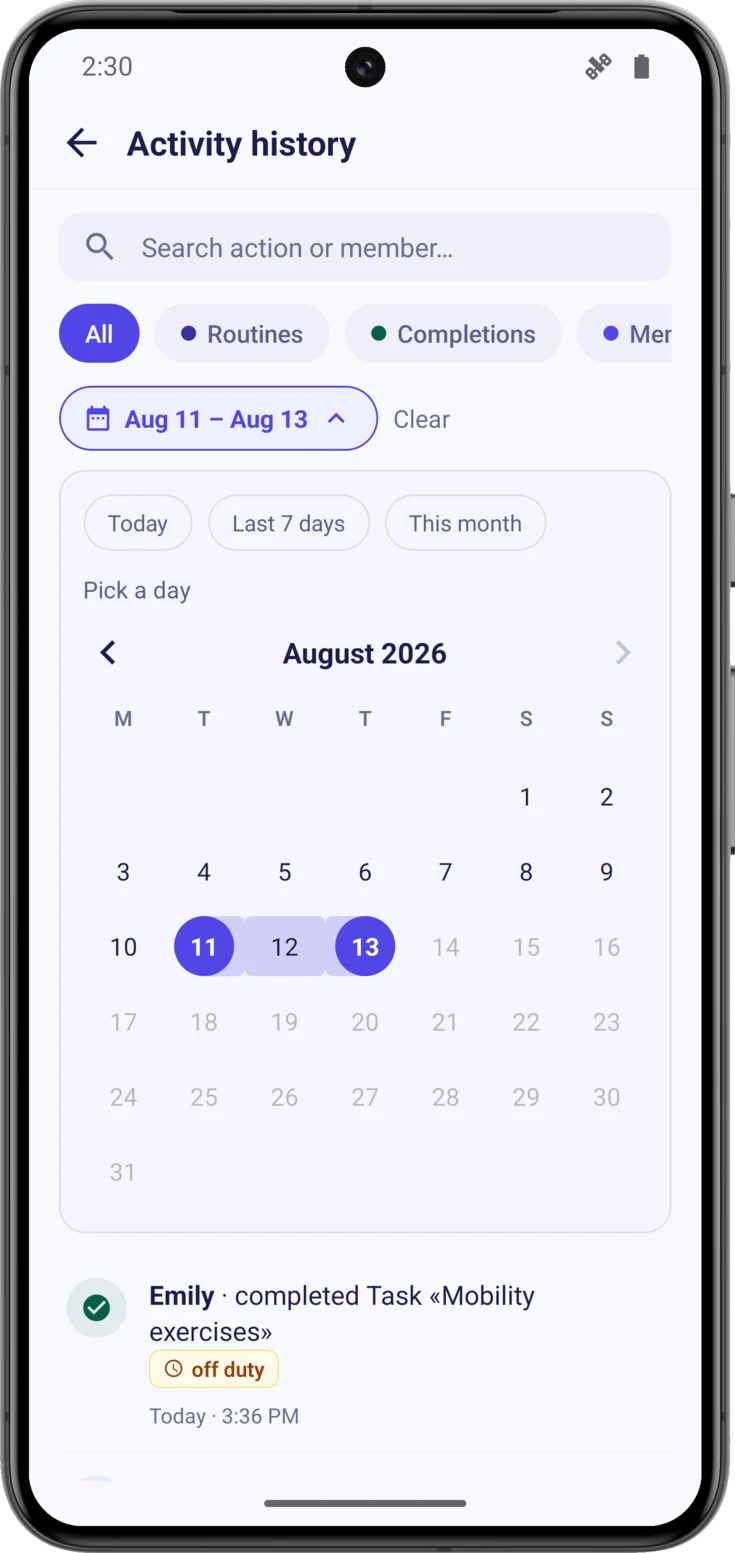
Below the filters is «Dates», which opens a calendar to go straight to a day in the past without scrolling down looking for it. Once chosen, that same button goes on to show the range —«Aug 4 – Aug 8»—. The first tap marks the starting day and the second closes the range. If the second falls before the first, that one becomes the new start, so there is no way of getting the order wrong.
For a single day, tap it and press «Show only that day». At the top you have «Today», «Last 7 days» and «This month», and with «Clear» you go back to seeing everything. It combines with the search box and with the filters: you can ask for the completions of one particular week.
How far back it goes
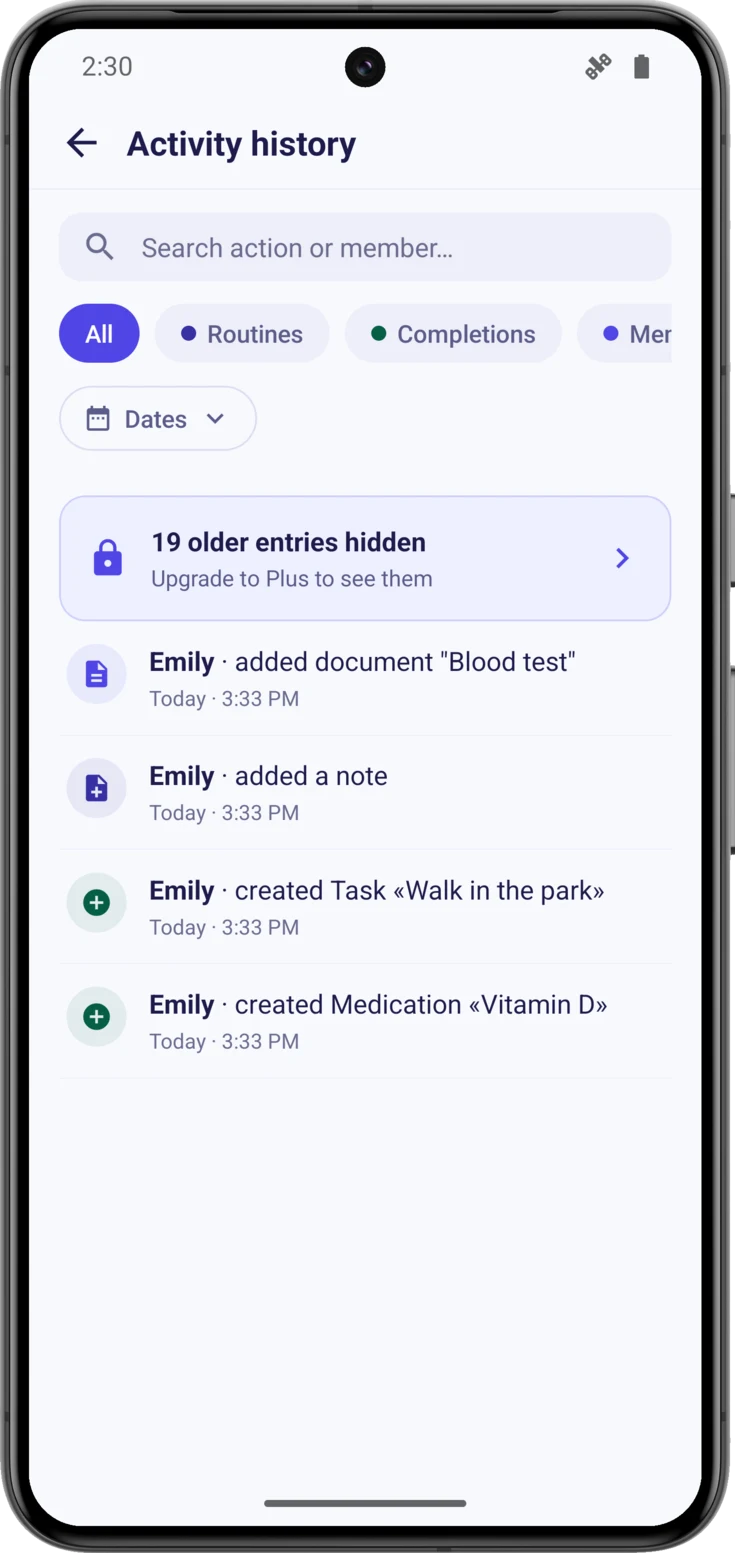
The history shows 14 days with Free, 6 months with Plus and no limit with Pro. If there are older entries, the screen itself says so —«19 older entries hidden»—. They have not been deleted: they are outside the window the plan covers.
Your groups
Switch, create or leave a group
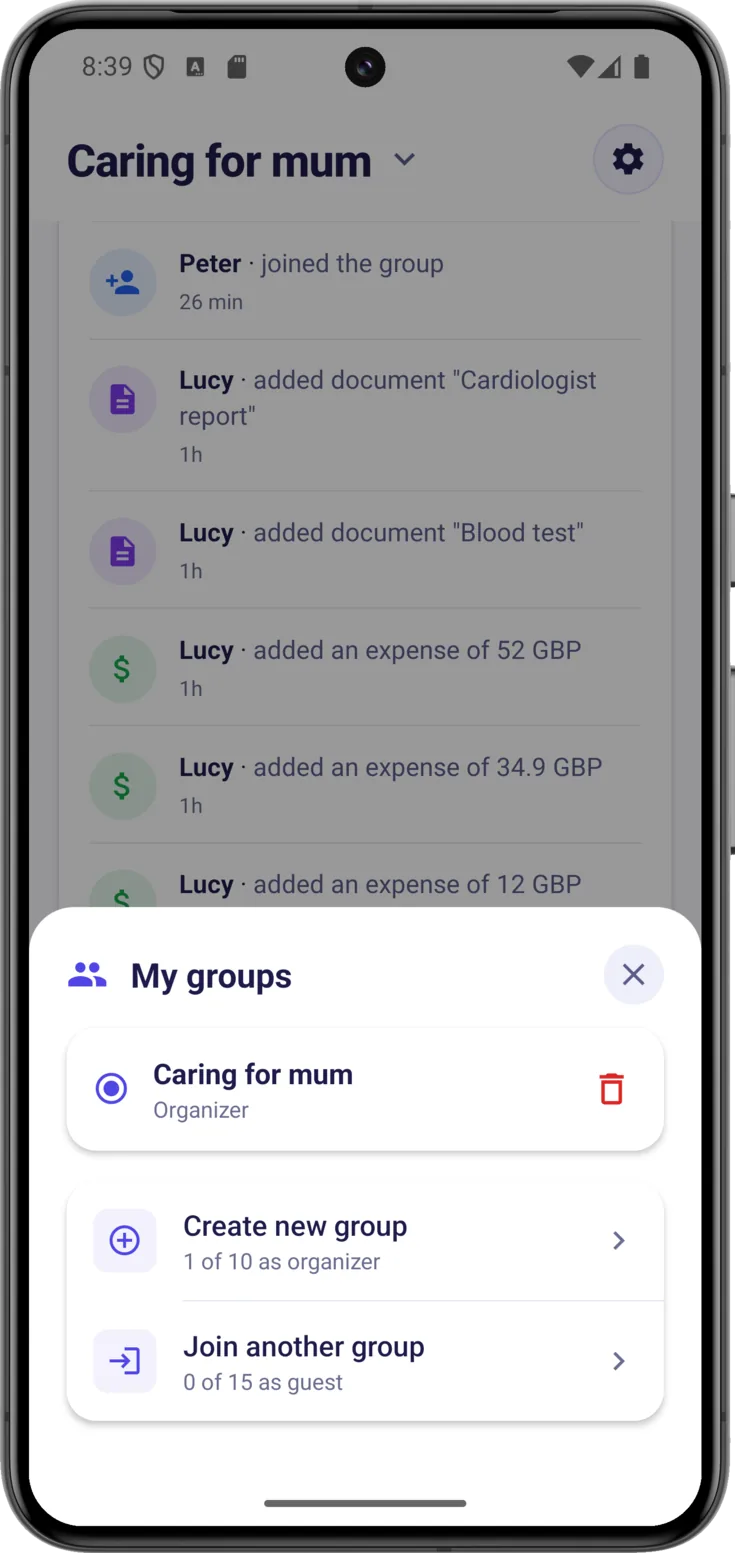
With the settings icon your list of groups opens. From there:
- Switch the active group by tapping the one you want. Next to each one you see your role.
- Create a new one or join another with a code. Each option carries its counter —«1 of 3 as organizer», «0 of 5 as guest»—. A group with a closing date still counts there until the day it closes: if you delete one to make room for another, the place is not freed up beforehand.
- Leave if you are not the organizer, or delete if you are. If there are more people in that group, that wastebasket does not delete it there and then: it gives it a closing date, and the app confirms to you which one it is.
If the group you leave was the active one, the app moves you on to the next one by itself. And if it was the last one, it takes you to the welcome screen to create another or join one: your account stays intact. When what you are doing is giving a shared group a closing date, on the other hand, nothing moves anywhere: it carries on being your active group and you carry on seeing all of it until the day arrives.
Joining another group
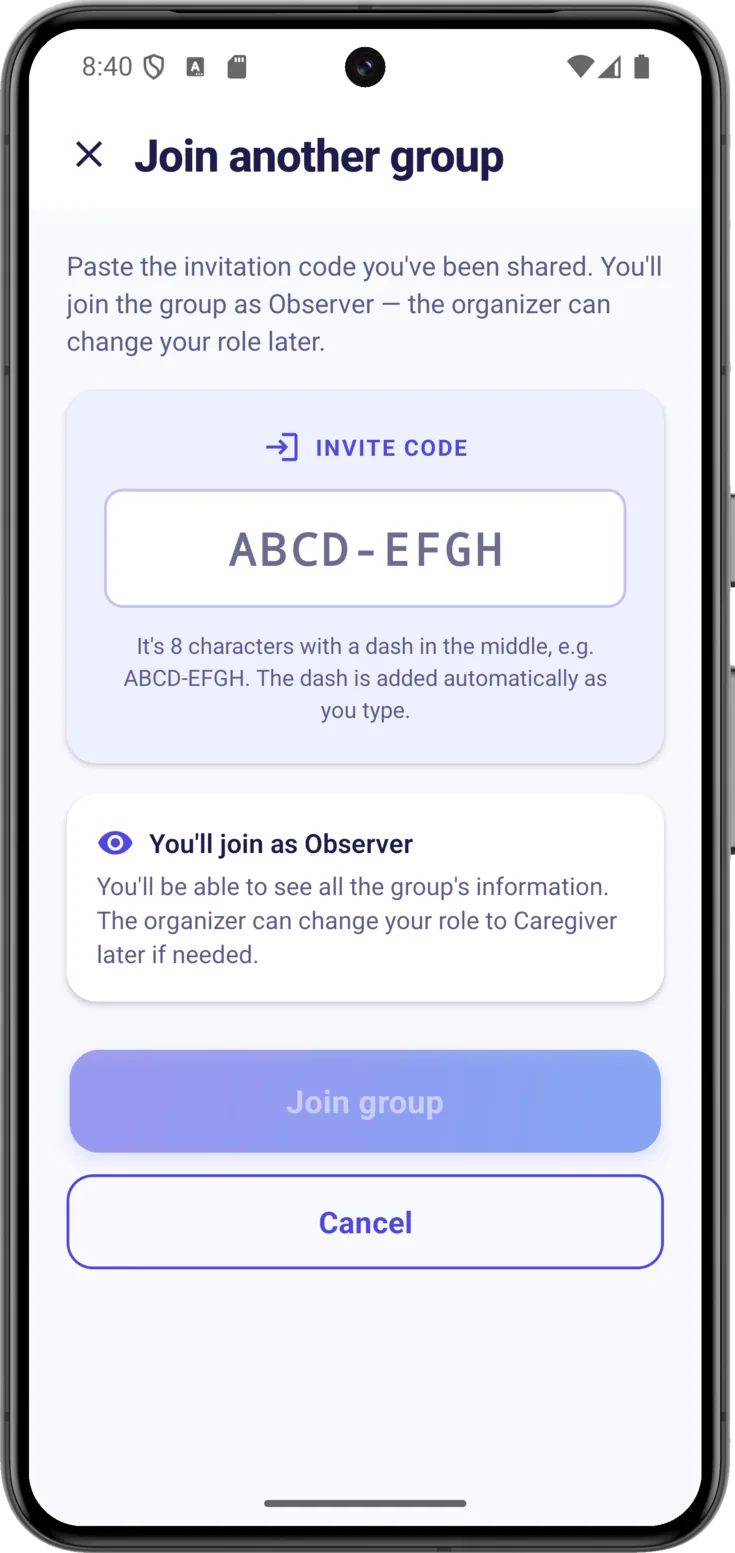
Paste the invitation code
Tap the settings icon , open «Join another group» and type in the code they have passed you. When you press «Join group» you will come in as an Observer; if it is needed, whoever organizes that group will give you more permissions later on.
You can belong to several groups at once —you care for two people, or somebody else adds you to theirs— and the app keeps them separate.
There is one case in which a correct code will not let you in: that the group already has a closing date. The way out is to talk to whoever organizes it, who can lift the closure and invite you again. If you were already a member and you are using your code after reinstalling the app, that does work even with a closure announced.
If the group has a closing date
What the amber notice says
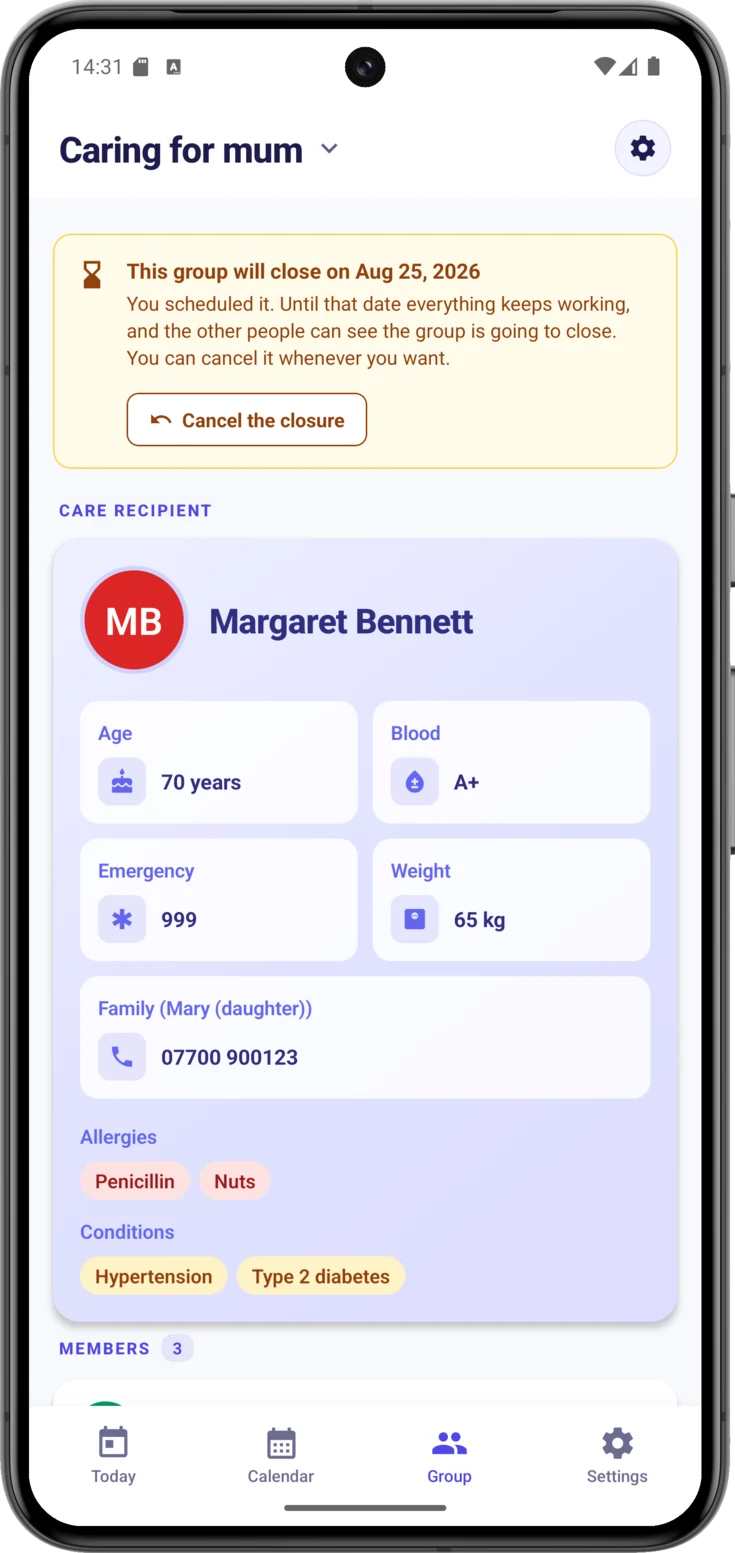
When a group has a closing date, an amber banner with an hourglass heads the Today and Group screens, saying the exact day. Tapping it opens it up and tells you where the decision comes from: if you were the one who scheduled it, that you can cancel it whenever you want; if it was whoever organizes the group who decided it, how far the deadline runs.
Notice what disappears in the meantime: the pencil for editing the details of the person being cared for is no longer there. It is the sign that the group has stopped accepting changes, even though the care carries on.
How to lift the closure
The «Cancel the closure» button is only seen by whoever organizes the group, and it is only on the Group screen: on Today the notice informs you, but it carries no button. When you press it, the notice disappears from the phone of everybody in the group and everything goes back to normal.
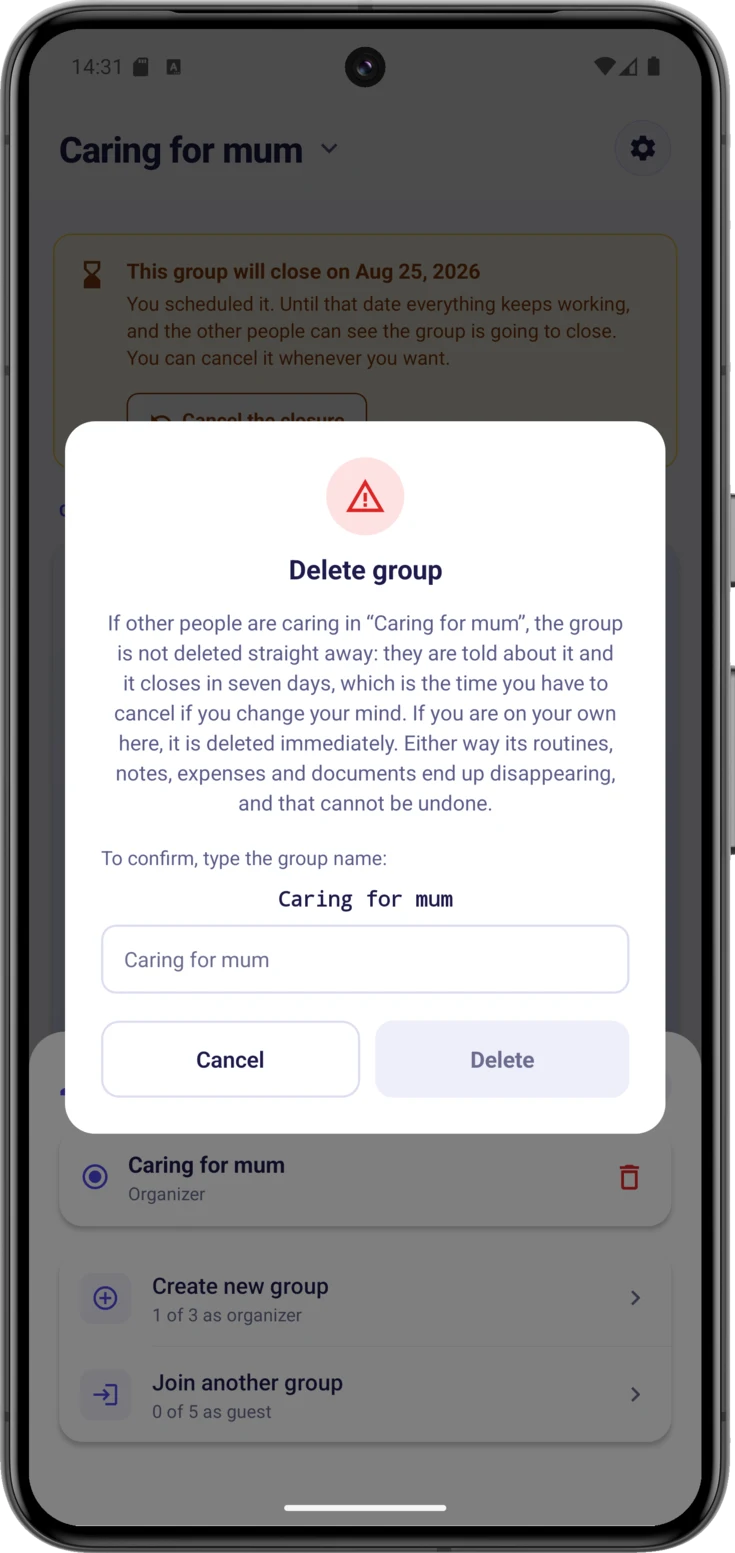
This picture is the dialogue from the previous step, the one that asks you to type the group’s name to accept the deletion. It is worth reading in full, because it explains what is really going to happen: with more people inside, the group is not deleted there and then, it closes seven days later, and within that time it can be cancelled. On your own it is deleted straight away.
There is one case in which «Cancel the closure» does not work, and the app explains it: when the closure comes from whoever organizes the group having asked to delete their account. That is not undone from here, but by cancelling that deletion, and then the closure is lifted from all of their groups at once. It is told in Account and privacy.
If the group ends up in read-only mode
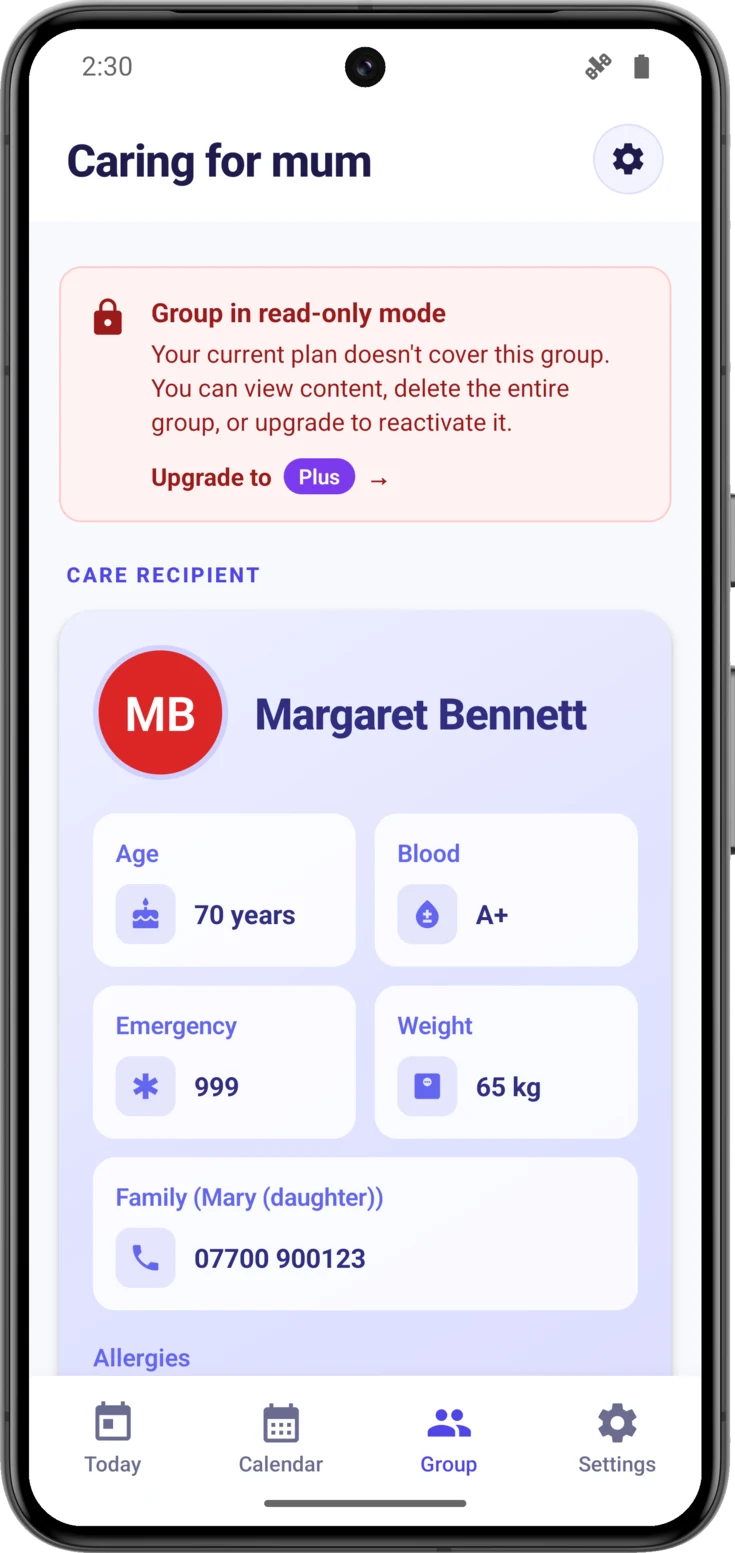
There are two different reasons why a group stops accepting changes, and they are told apart by the colour of the notice heading the screen. The red one says that the group does not fit in the plan of whoever organizes it, and that is the one explained here. The amber one says that the group has a closing date, and that one is explained in the previous section.
This is what a frozen group looks like
Each plan covers a number of groups. If whoever organizes the group moves to a plan that covers fewer, the groups they have over stay in read-only mode: a red notice heads the screen and nobody can create or delete anything in there, although everything can still be seen.
The two ways out depend on whoever organizes the group: upgrading their plan —the one that counts is theirs, not yours— or deleting one of the groups they have over, which is also up to them. If you are a caregiver or an observer, what you can do is let them know. Nothing is lost along the way — the Plans guide tells you about it.