
Routines are everything that comes round again in caring for someone and is best not forgotten. There are three types, each with its own form, so that it only asks you for what is really needed:
- Medication — which medicine, how much of it and at what times it has to be given.
- Appointment — a medical appointment: the reason for it, where it is and when.
- Task — everything that isn’t medical: washing, meals, a walk, a phone call…
What you write down here appears on its own in Today, at the time it is due, and also in the Calendar. The rest of the group sees it straight away: one person writes it down and everyone knows about it.
Where your routines live
Each type has its own list, holding the group’s whole history. You get there from Group, the button right at the bottom, going into «Medication», «Appointments» or «Tasks».
Search and filter
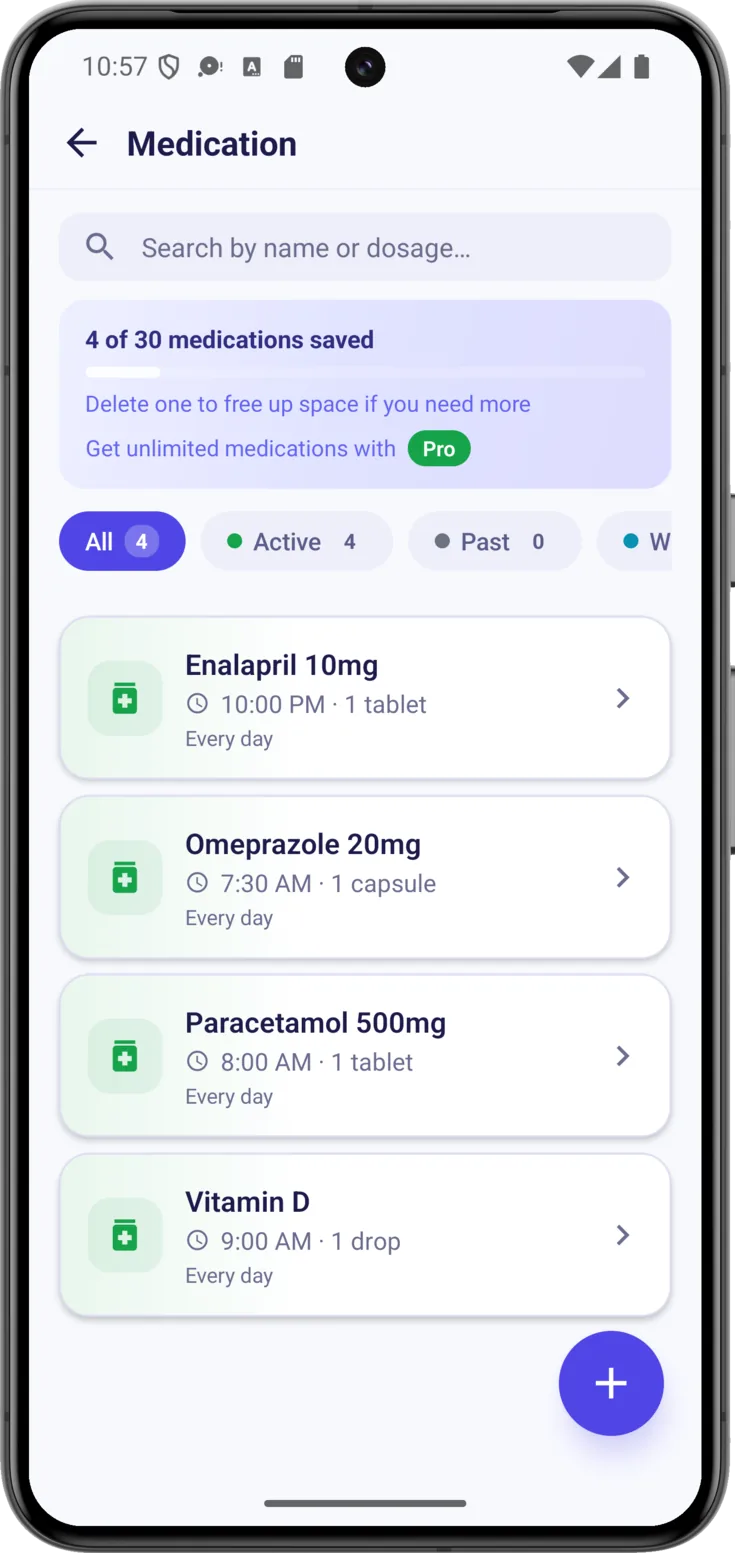
All three lists work in the same way, so you learn one and you know them all. The search at the top leaves only what matches in the list below as you type, without your having to tap anything.
Underneath it are the filters, each with its own counter. They don’t all fit on the screen: at first glance you have «All», «Active» and «Past», and by swiping the row to the right «With photo» appears.
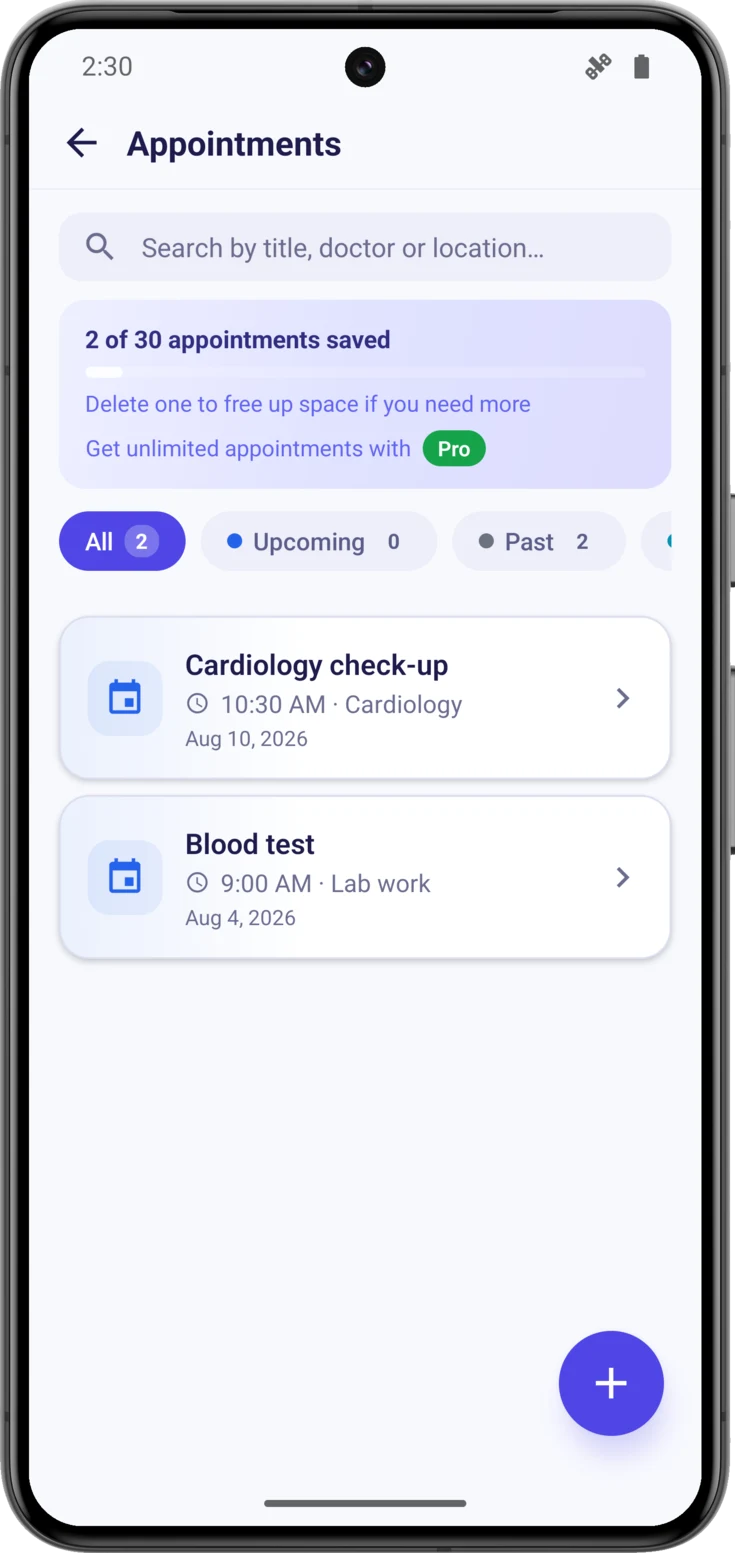
Appointments, with their own filters
It is the same screen, with the second filter called «Upcoming» instead of «Active», which makes more sense for an appointment, and with the specialty and the day on the card instead of the dose. In Tasks there are only three filters: as they don’t carry a photo, there is no «With photo».
If a filter’s counter is at zero, it isn’t a fault: it simply means there aren’t any right now.
Create a new one
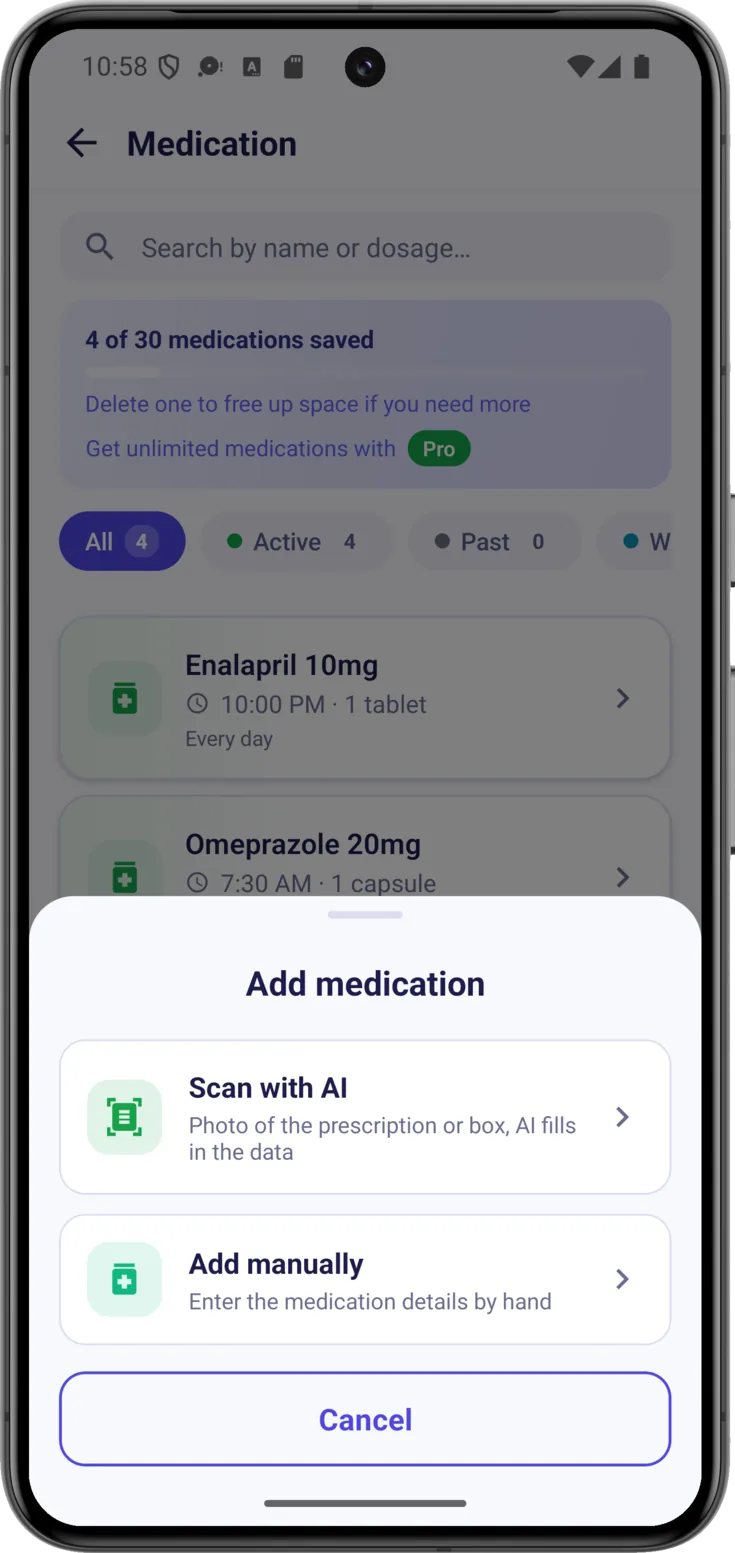
Tap the button at the bottom right. If your role can scan, it lets you choose between «Scan with AI» — one photo and the app fills it in — and «Add manually». If it can’t, it opens the form straight away.
In Tasks it never asks: it always opens the form, because tasks don’t come from any piece of paper.
Creating a medication
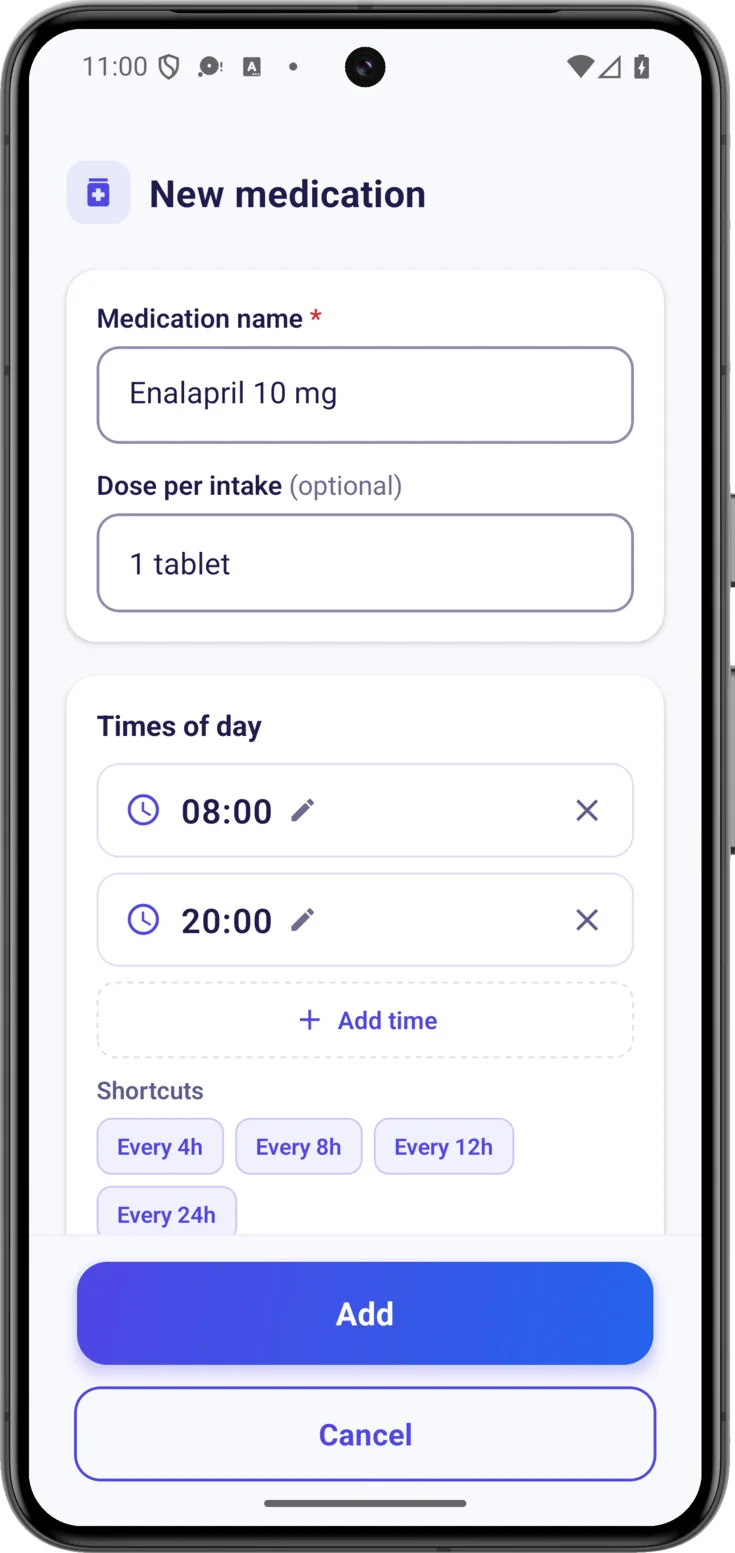
This is what you will do most often. The «New medication» form asks you for the details a bit at a time, from top to bottom.
Name and dose
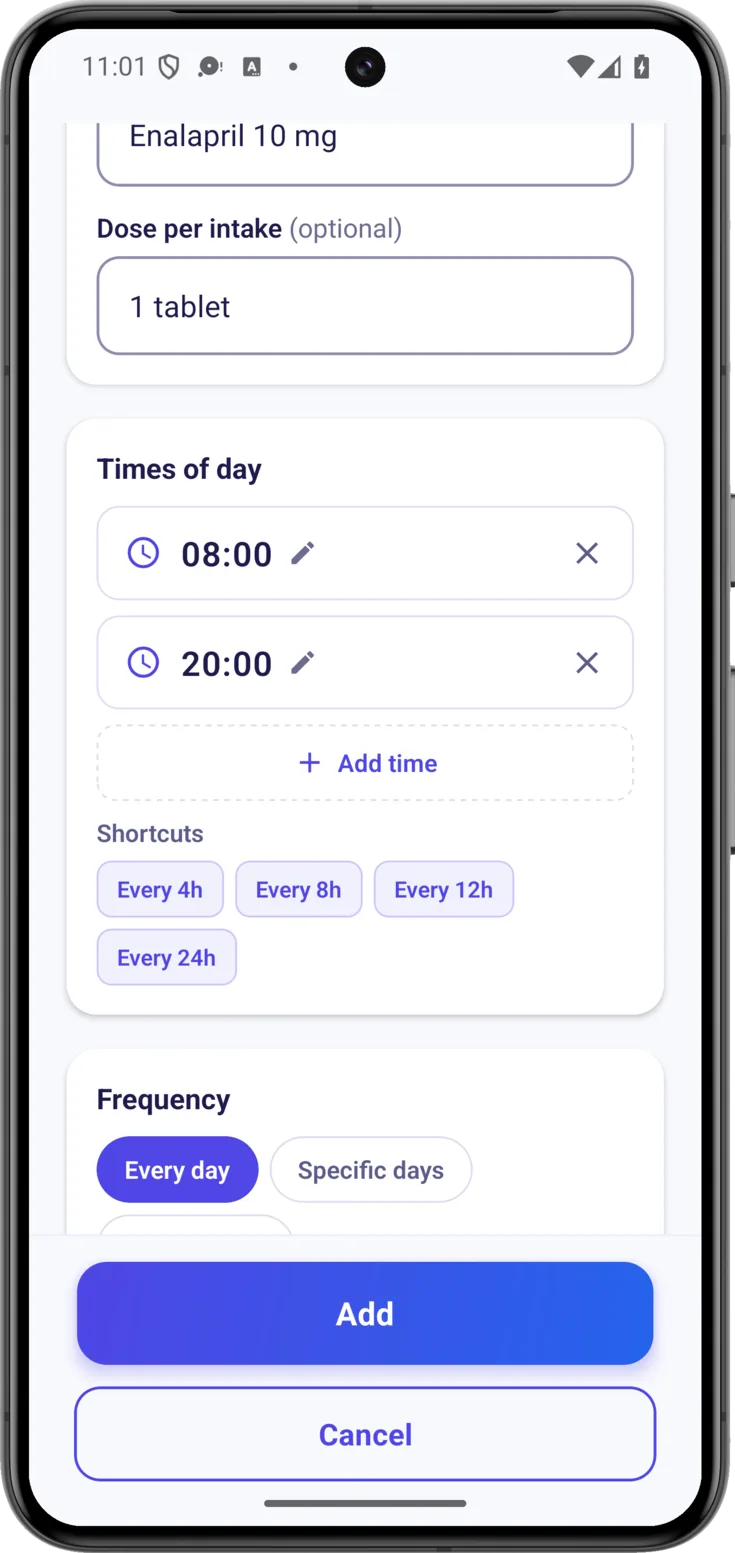
In «Medication name», the only required field, copy it exactly as it appears on the box so that there is no mistake: «Enalapril 10 mg».
Below it, the «Dose per intake» — «1 tablet», «half a tablet» — is optional, but it is well worth filling in: it is what lets any caregiver know how much to give without having to guess.
Times of day
In «Times of day» you add each time with «+ Add time» , as many as you need.
If the times are spread across the day, the shortcuts set them on their own: «Every 4h», «Every 8h», «Every 12h» and «Every 24h». If the doctor says «one every eight hours», you tap «Every 8h». These times are what will make the dose appear in Today, so it is worth getting them right.
How often and until when
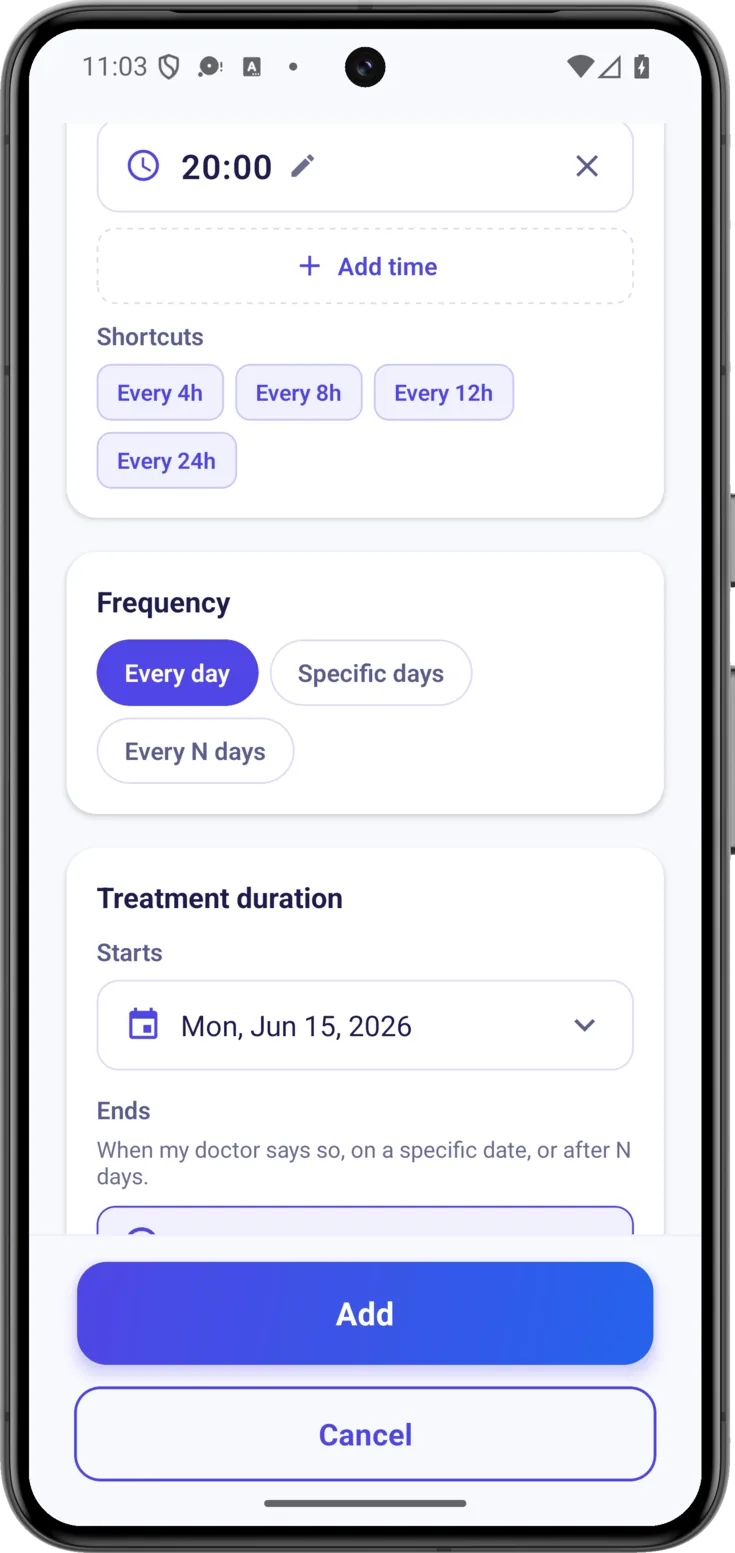
Under «Frequency», four options:
- «Every day» — the most common one.
- «Specific days» — only the ones you tick, Mondays and Thursdays for example.
- «Monthly» — the same day of every month as the start date: if you begin on the 28th, it falls on the 28th. This is the one for monthly injections.
- «Every N days» — every two days, every three… counted from the start date.
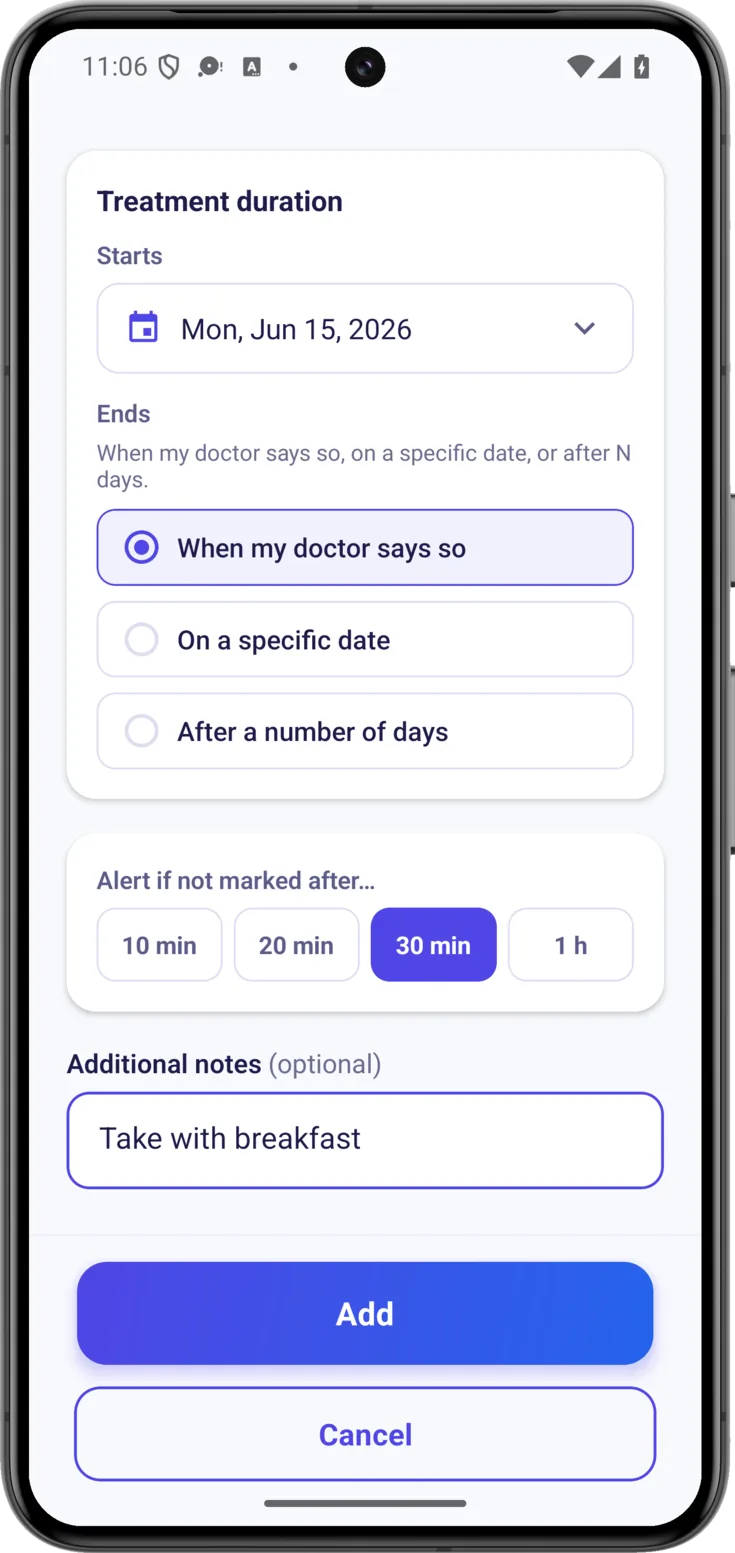
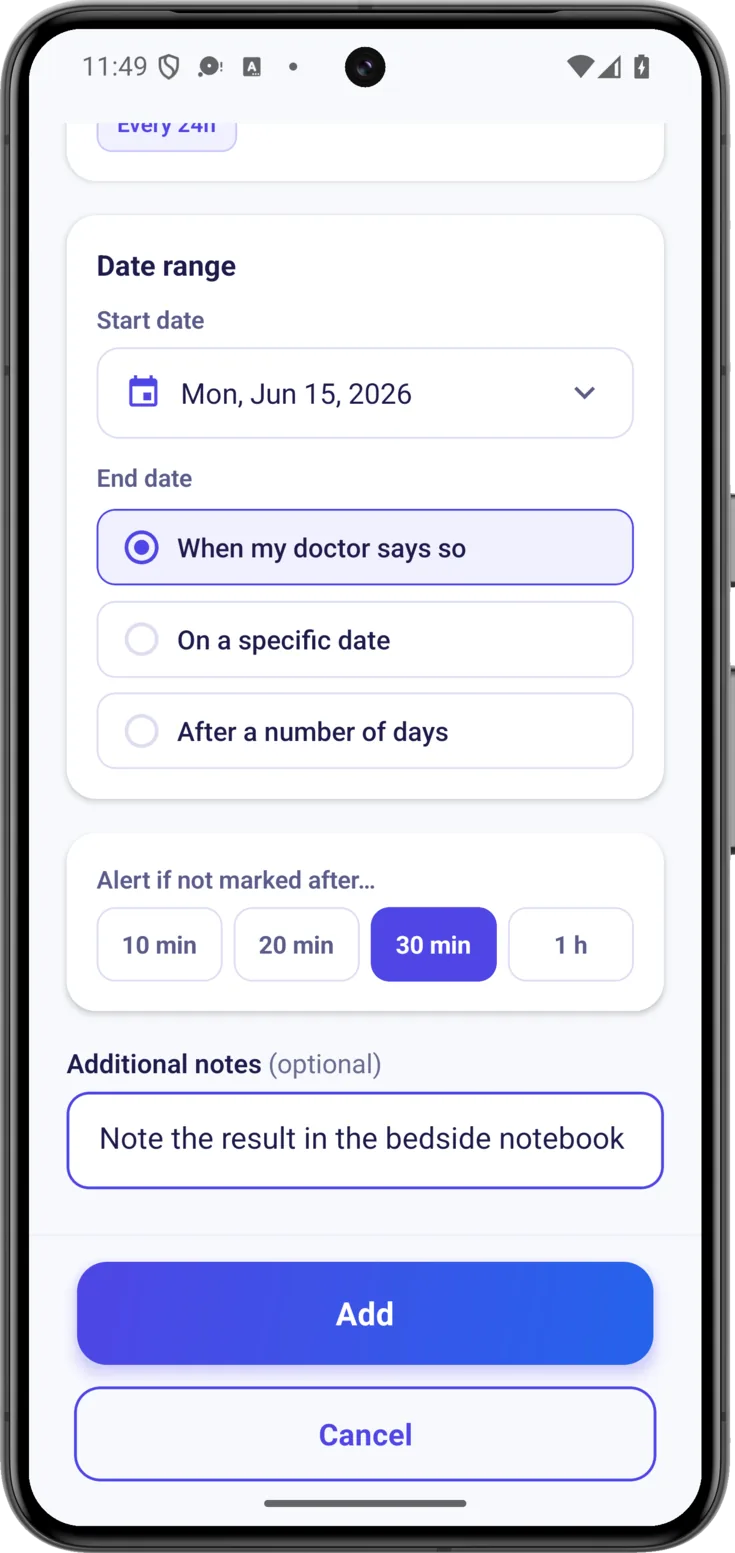
Below that, under «Treatment duration», you say when it begins and when it «Ends»: «When my doctor says so», «On a specific date» or «After a number of days», which is the one for the seven-day antibiotic. That way the app stops reminding you about a pill that is no longer due.
Alerts and notes
Under «Alert if not marked after…» you choose how long the app waits before telling you that a dose has been left unmarked: 10 min, 20 min, 30 min or 1 h.
At the bottom, «Additional notes» for anything worth remembering, such as «take with breakfast». When you have it all, the «Add» button at the end saves the whole medication, and from that moment the whole group can see it.
Creating an appointment
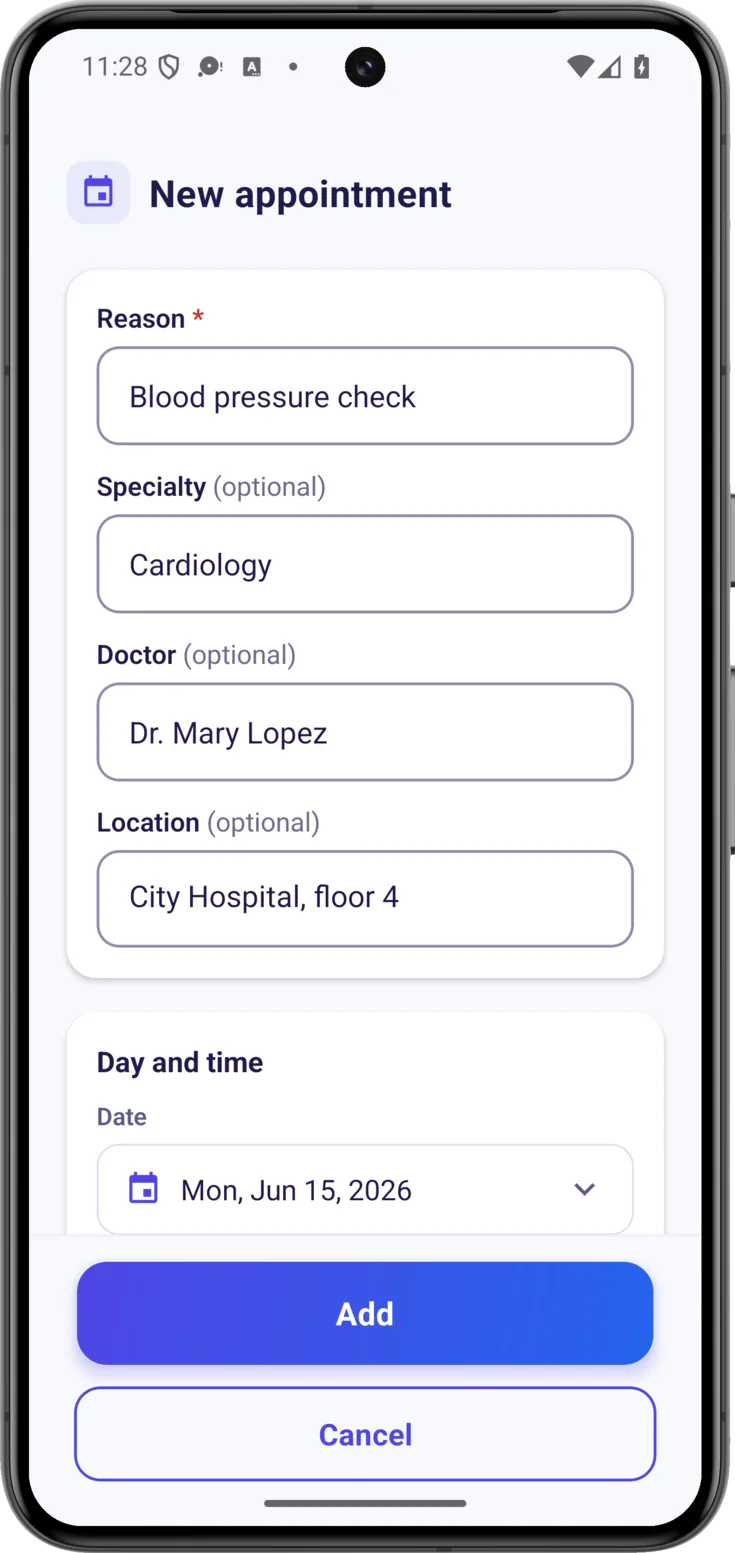
The «New appointment» form works in the same way, adapted to a medical visit, so that the whole group knows when and where it is without depending on a scrap of paper on the fridge.
Reason and details of the visit
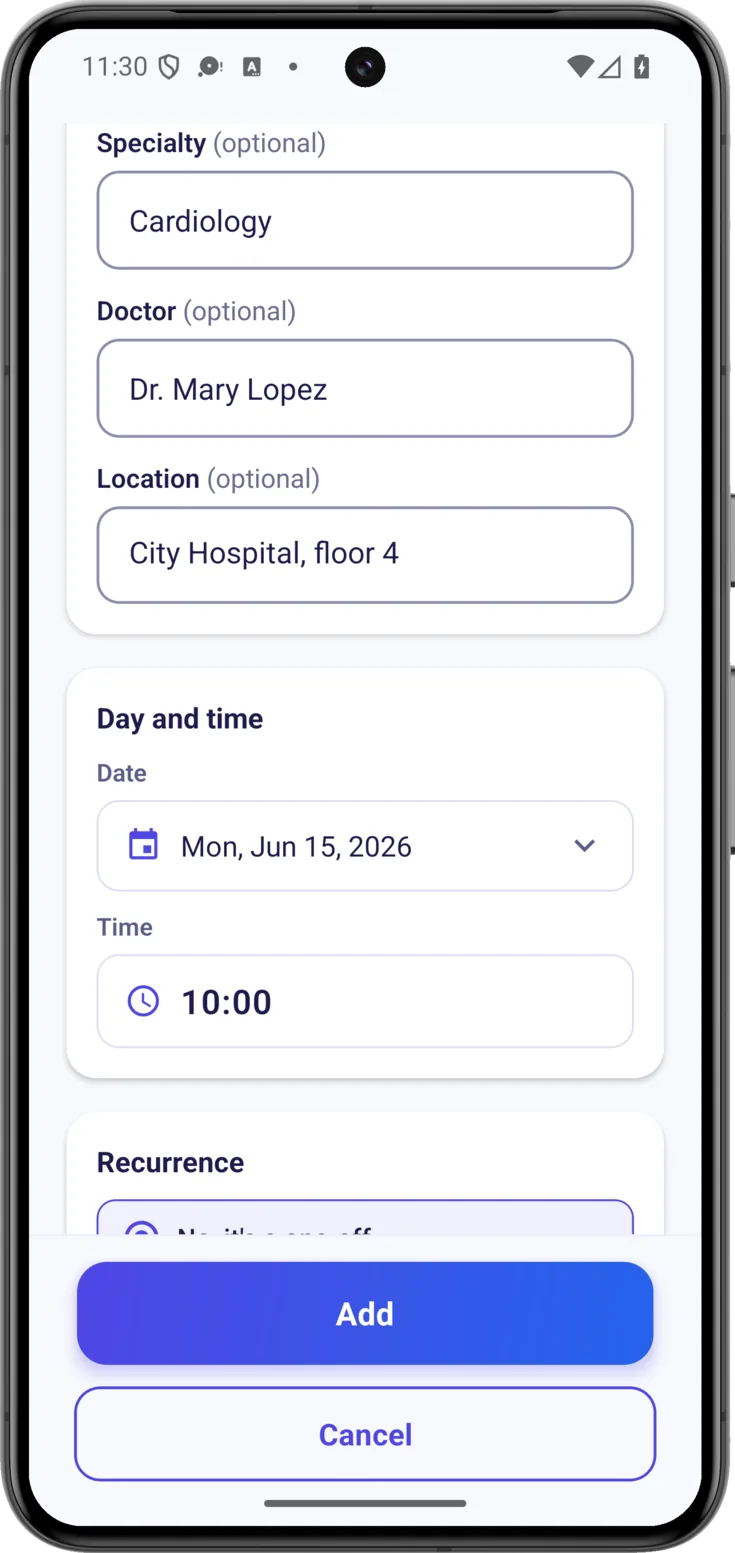
The «Reason» is the only required field: what the appointment is for, «Blood pressure check», «Blood test».
After that, if you know them, the «Specialty», the «Doctor» and the «Location». They are optional and they help you get there without any stress, but it doesn’t matter if you don’t have them all.
Date and time
Choose the «Date» by tapping it on the calendar that appears, and then the «Time». This is what will make the appointment alert you when the moment comes and show up in Today on the day itself.
Does it repeat?
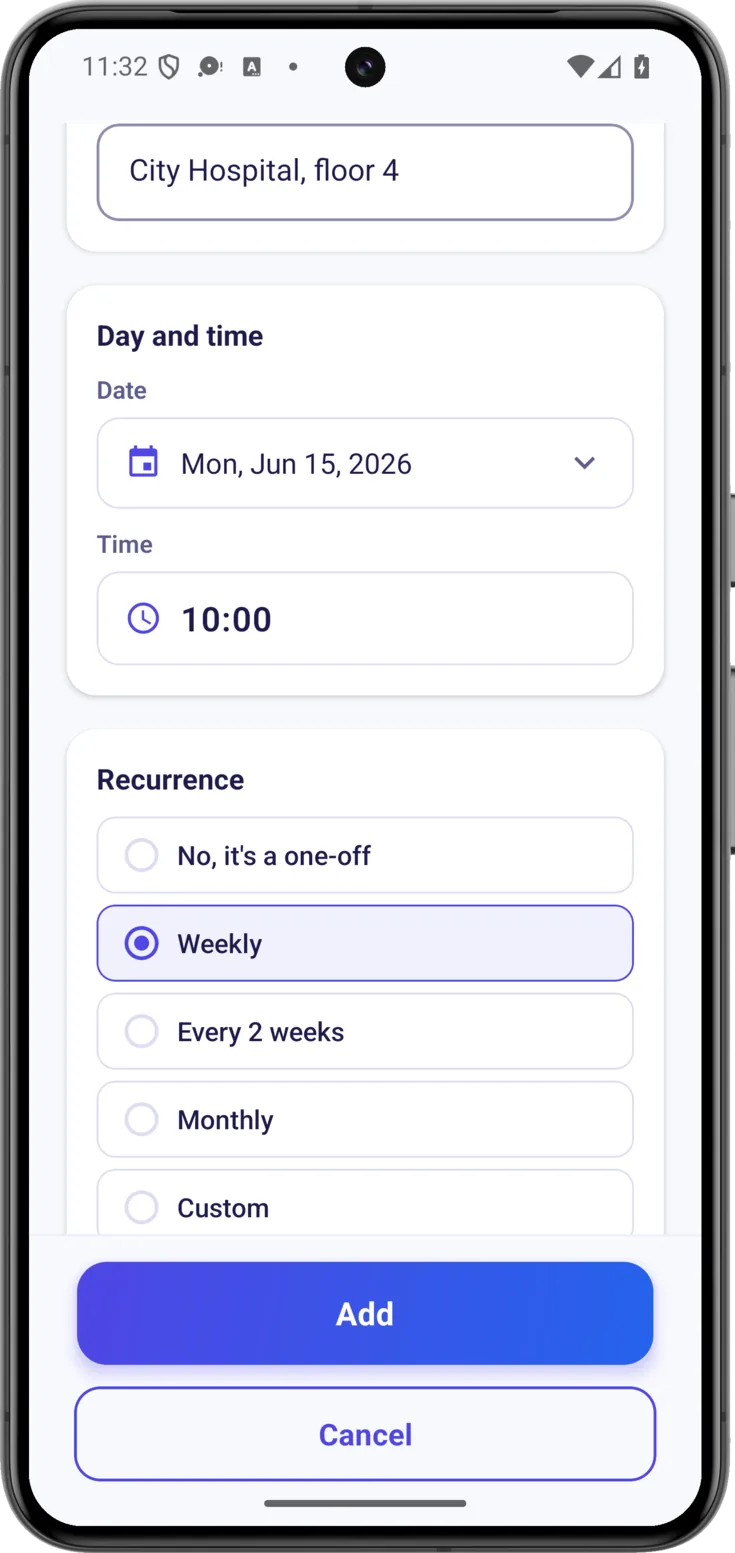
Most appointments happen only once: in that case leave «No, it’s a one-off» ticked and that’s that. If it is one of those that come round again — rehabilitation, a monthly check-up — choose how often it repeats; and if none of the options fits, «Custom» opens an «Every … days» for you to set the interval yourself.
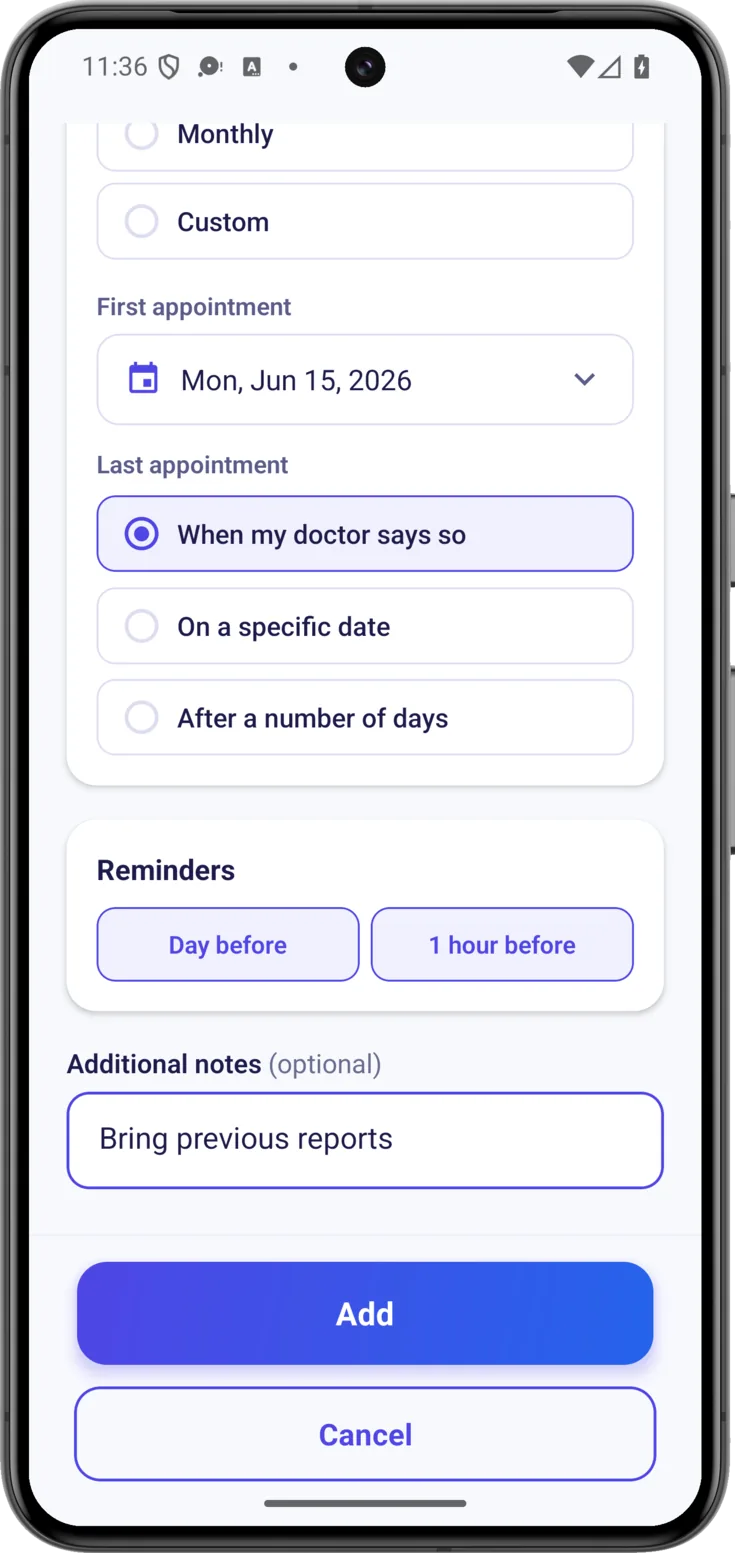
When you choose a recurrence, «Last appointment» appears below it, which is how long it goes on repeating for. You don’t have to note the first one separately: it is the «Date» you chose above.
Reminders
Here you choose the alerts for this appointment: «1 hour before», which comes already switched on, and «Day before», switched off. You can leave one, both or neither.
The day-before one goes off at the same time on the previous day: if the appointment is on Thursday at 10:00 AM, the alert arrives on Wednesday at 10:00 AM, not in the small hours. If the appointment repeats, alerts are prepared for each one. Below it, «Additional notes» for anything important — «Come fasting», «bring the reports» — and «Add».
Creating a task
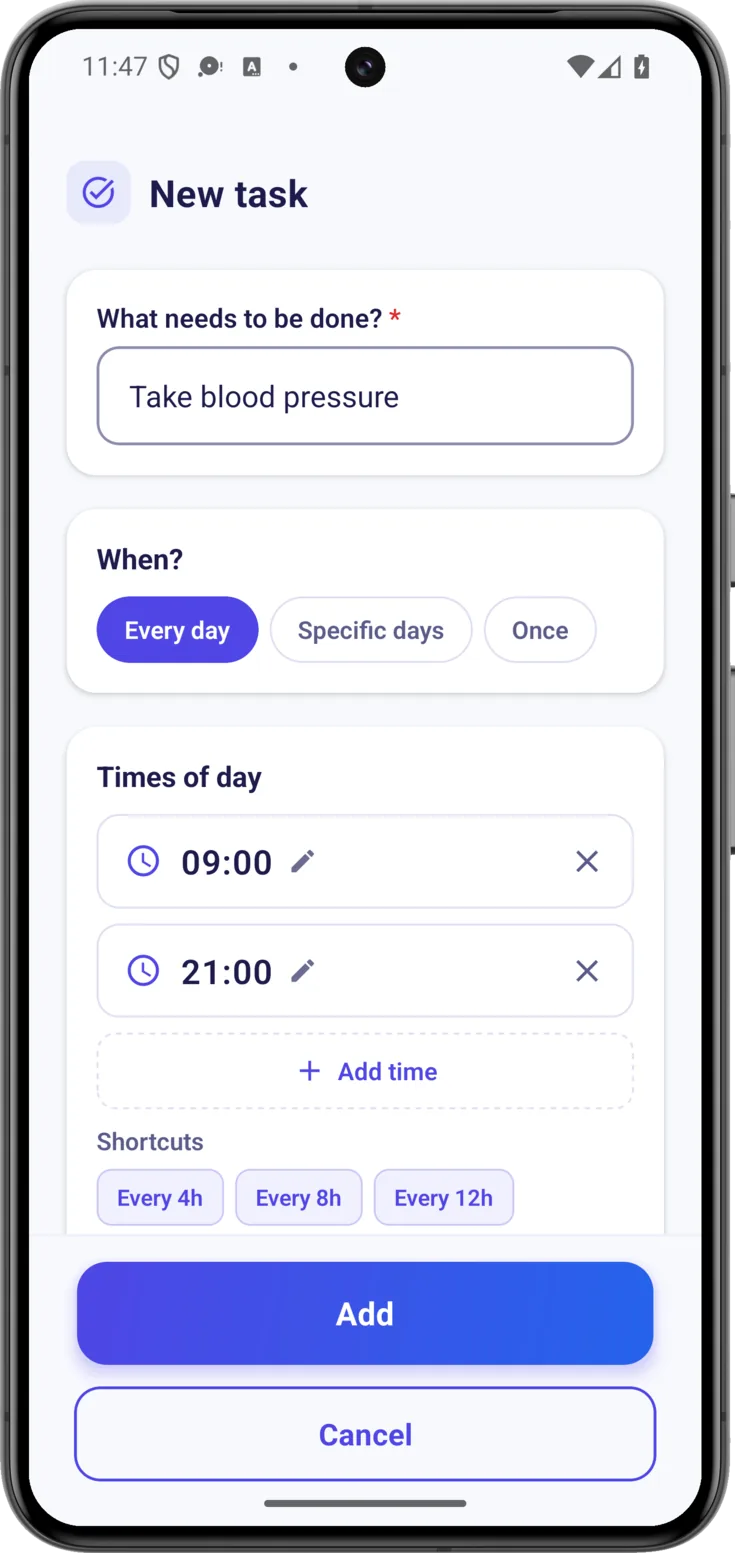
For everything that is neither medication nor an appointment but is still part of caring: washing, meals, keeping someone company, a phone call. The form is «New task».
What has to be done and when
In «What needs to be done?» write it in your own words: «Take blood pressure», «Help with the shower».
In «When?» you choose how often it repeats: «Every day», «Specific days» or «Once». Below that, in «Times of day», you set the times, with the same shortcuts as in the medication form.
Dates, alerts and notes
Give the particular day or the «Date range» within which it has to be done. Below that you decide whether you want the app to alert you when it isn’t marked in time, with the same leeway as in the medication form, and you add «Additional notes» if more detail is needed, such as «use the cream from the bathroom shelf». With «Add» it is saved for the whole group.
The alerts you are going to get
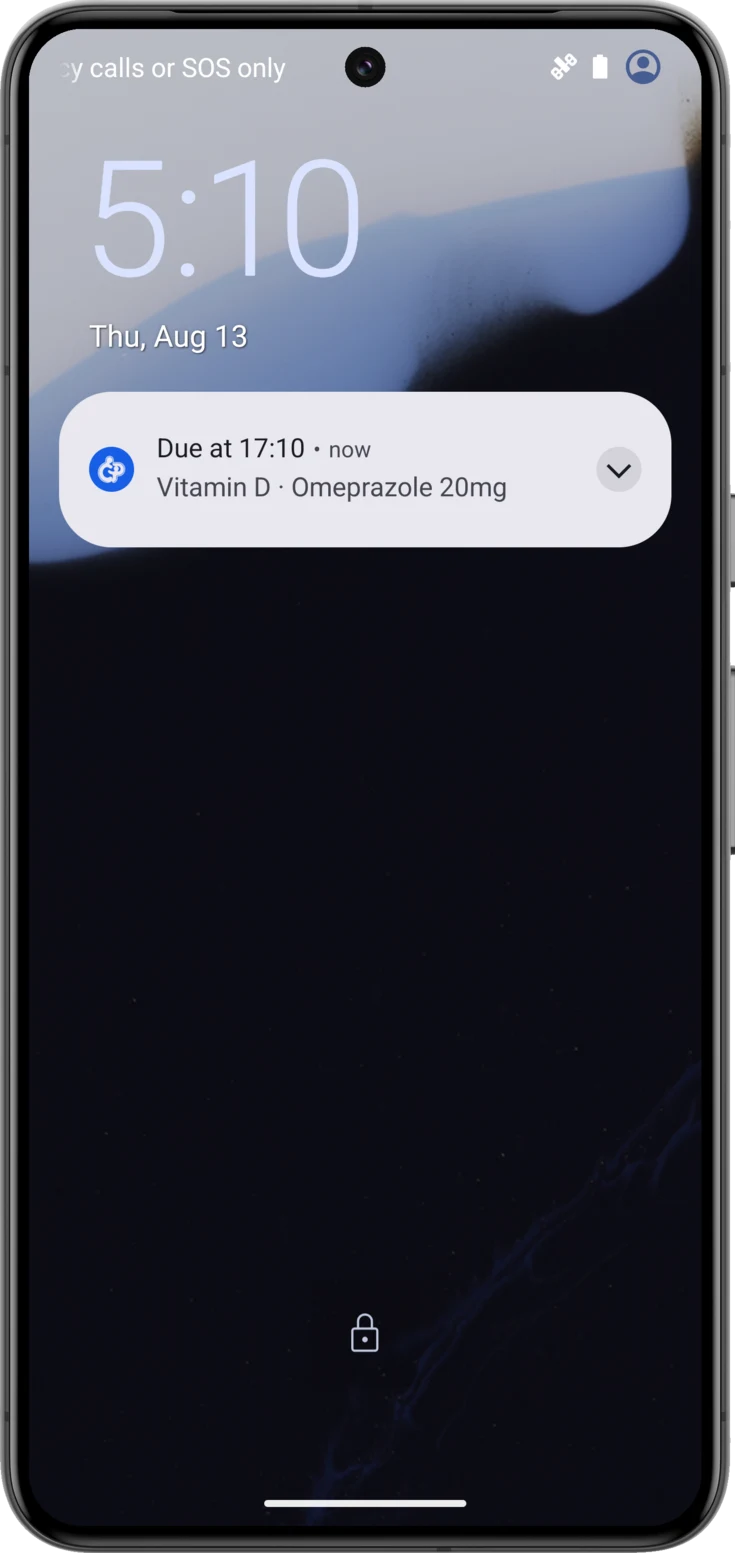
This is the part you notice most from day to day. At the exact time, the phone tells you about everything that is due at that time, with a message headed «Due at 09:00» and the names underneath. Both medications and tasks come in here: if there are three pills and a walk at nine o’clock, a single alert arrives with all four things, not four alerts one after another.
One alert per time, not per pill
The body has room for up to three names; if more are due, it closes the list by counting the ones left over — with the four things in the example it would say «and 1 more». That way you know what has to be given without opening the app.
- Appointments don’t come in here: they have their own alerts, the ones you choose when you create them.
- The alert is prepared on your own phone, it isn’t sent out by a server. That is why it works with no signal, and why it can say the real names of the medication without them ever leaving your phone.
All of this is switched on and off with the «Reminders» toggle in Settings, which comes switched on. You have it in the Settings guide.
Android
They go through the «Reminders» channel, with normal importance. The sound and the vibration are adjusted from Settings → «Phone notification settings».
If you have Do Not Disturb on, these alerts are silenced along with all the rest.
iPhone
They are marked as time sensitive, so they sound even if you have a Focus mode switched on — Sleep, Work, Do Not Disturb. That is deliberate: a dose cannot wait until you come out of the meeting.
That marking is kept for this and for the alert about what is left undone. The weekly summary and the spending alerts don’t carry it, because those really can wait.
Scan with AI (the fast lane)
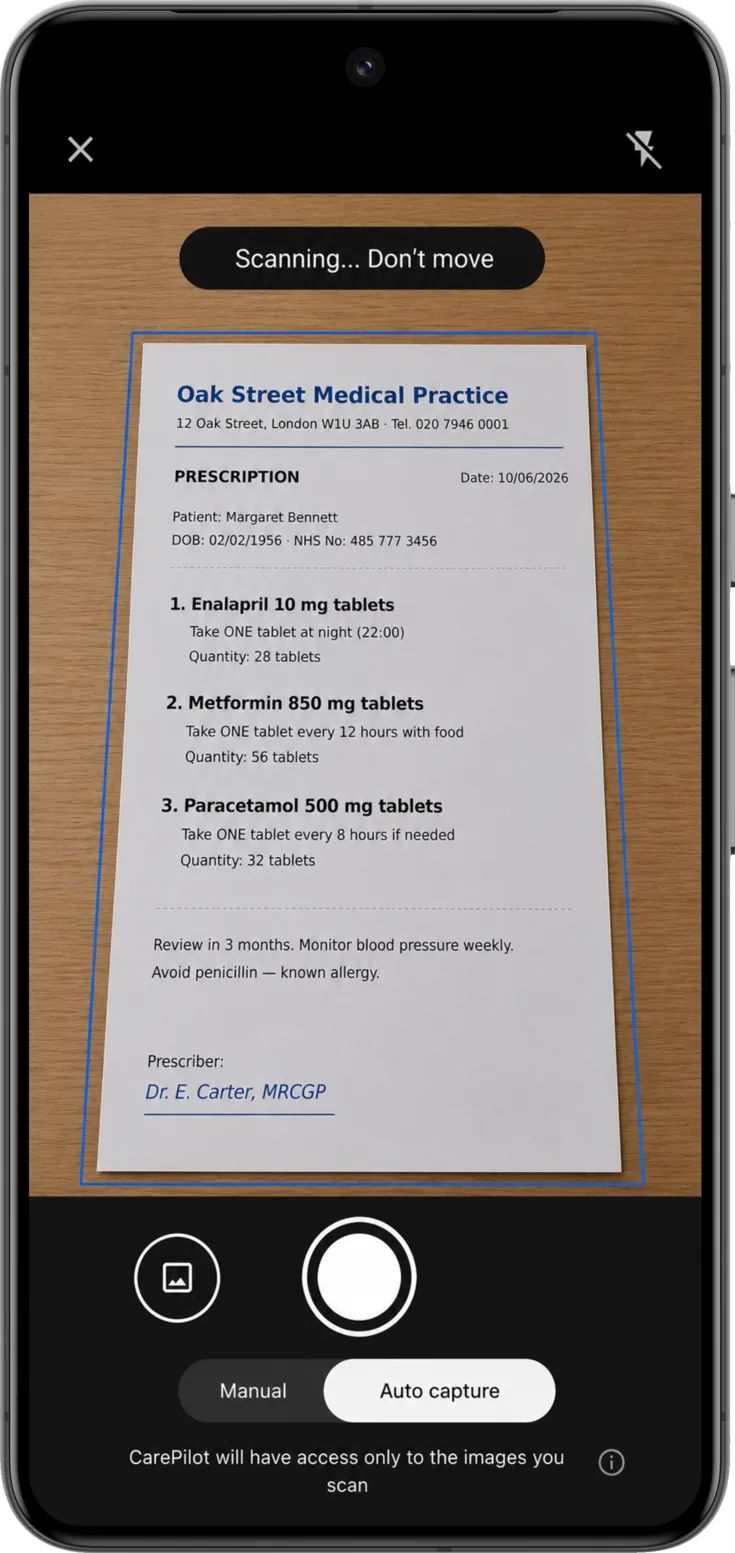
Medications and appointments can also be written down without typing: you take a photo of the prescription or the referral slip and the artificial intelligence fills the form in. Tasks can’t, because they don’t come from any piece of paper.
One photo and the AI fills in the form
From the button choose «Scan with AI» , frame the document and let the camera capture it. In a few seconds the form opens already filled in for you to check over and save.
The whole process — importing a photo from the gallery, documents with several pages, how many scans each plan includes and how the privacy of those images is protected — is in Scan with AI.
Viewing, editing or deleting a routine
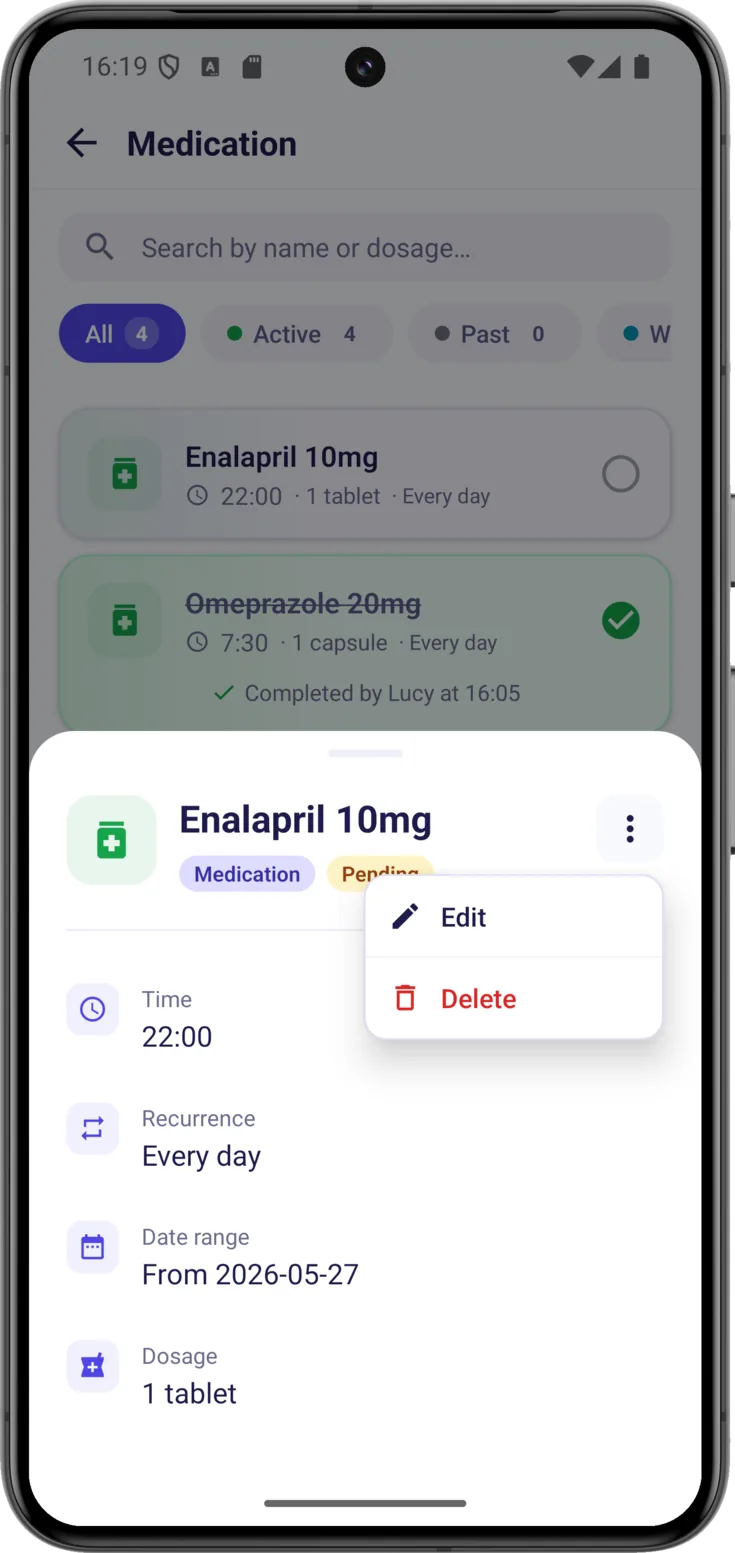
Routines aren’t set in stone: the doctor changes a dose, an appointment gets moved, a task is no longer needed. Tap any of them — from its list, from Today or from the Calendar — and you will see its detail: times, frequency, dates, dose or location, the photo if it has one, and who marked it today and at what time. The complete history is in Group → Recent activity.
Edit or delete
At the top right of the detail is the menu. «Edit» opens the form again so that you can change whatever you need to.
«Delete» removes it altogether, and it asks you to confirm because deleting a routine also deletes its completion history — the record of who marked it each time — and that cannot be recovered. If it is simply that the treatment has come to an end, it is usually better to let it expire on its own date.
How many you can save
Each list shows a quota bar with how many you have saved — «7 of 10 medications saved» — so that the limit doesn’t take you by surprise.
| Free | Plus | Pro | |
|---|---|---|---|
| Medications | 10 | 30 | Unlimited |
| Appointments | 10 | 30 | Unlimited |
| Tasks | 10 | 30 | Unlimited |
| Encrypted photos | — | ✓ | ✓ |
The camera scans aren’t in that table because they don’t work the same way: they are not a group limit but yours, and they count against your own plan whichever group you use them in. You have it in Scan with AI.