Settings is where you set the app up the way you like it and where you manage what is yours: your account, your plan, the alerts and your privacy. It isn’t something you use every day, but rather when something isn’t the way you want it.
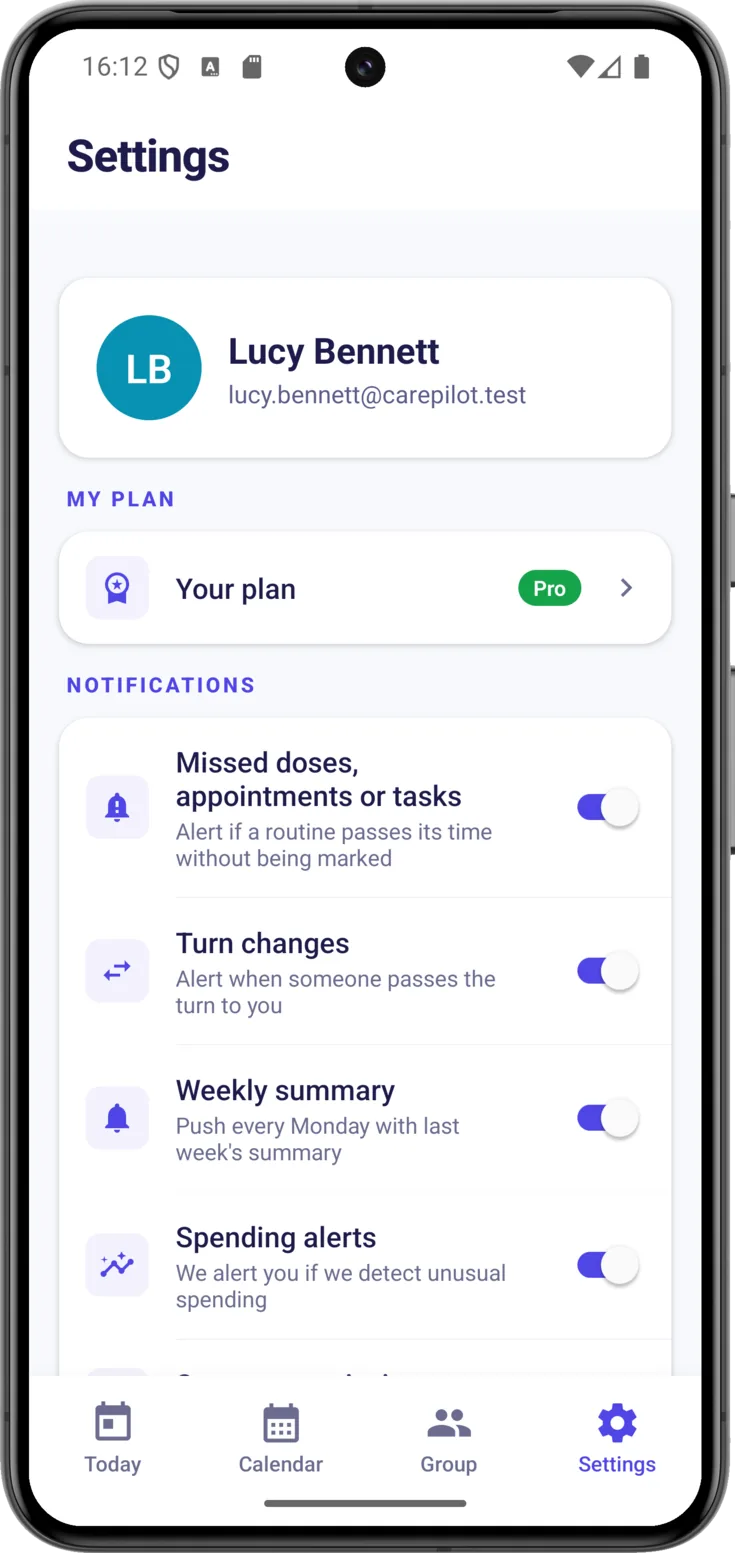
You get there from Settings, the last button on the bar at the bottom, the one with the cogwheel. Right at the top is your profile, with your name and your email, so that you know which account you have signed in with.
Your plan
A lot of things depend on your plan: how many groups you can have, how far back you can look in the history and which themes you can use. It is worth knowing that the history is never deleted: if your plan lets you see fewer months, everything before that is still stored and comes back in full as soon as you move up to a better plan.
And there is one thing that catches people out when they are making room: a group that is waiting to close still counts as one of your groups until the day it closes, so the place it takes up in your plan does not become free before that date. If you delete one so that you can create another, you will have to wait until the time is up.
Check or upgrade your plan
The plan row is the very first one, just below your profile , and you recognise it because the plan you are on is written on the right: Free, Plus or Pro. Depending on which one it is, the row has a different name: «Upgrade plan» on Free, «Manage plan» on Plus and «Your plan» on Pro. All three lead to the same place. Tapping it opens the screen where you can compare them and upgrade. Going in for a look doesn’t sign you up for anything: you are only charged if you confirm.
At the end of that screen there are two buttons:
- «Restore purchases», always visible. It is for when you reinstall the app or change phones and you show up as Free even though you are paying: you tap it and it gives you your plan back.
- «Manage subscription», only if you already pay. It takes you to the store where you bought it —Google Play or the App Store, depending on your phone—, which is the only one that can change your plan or cancel it.
Both of them are explained step by step, along with what happens when you cancel, in Plans and subscriptions.
Notifications
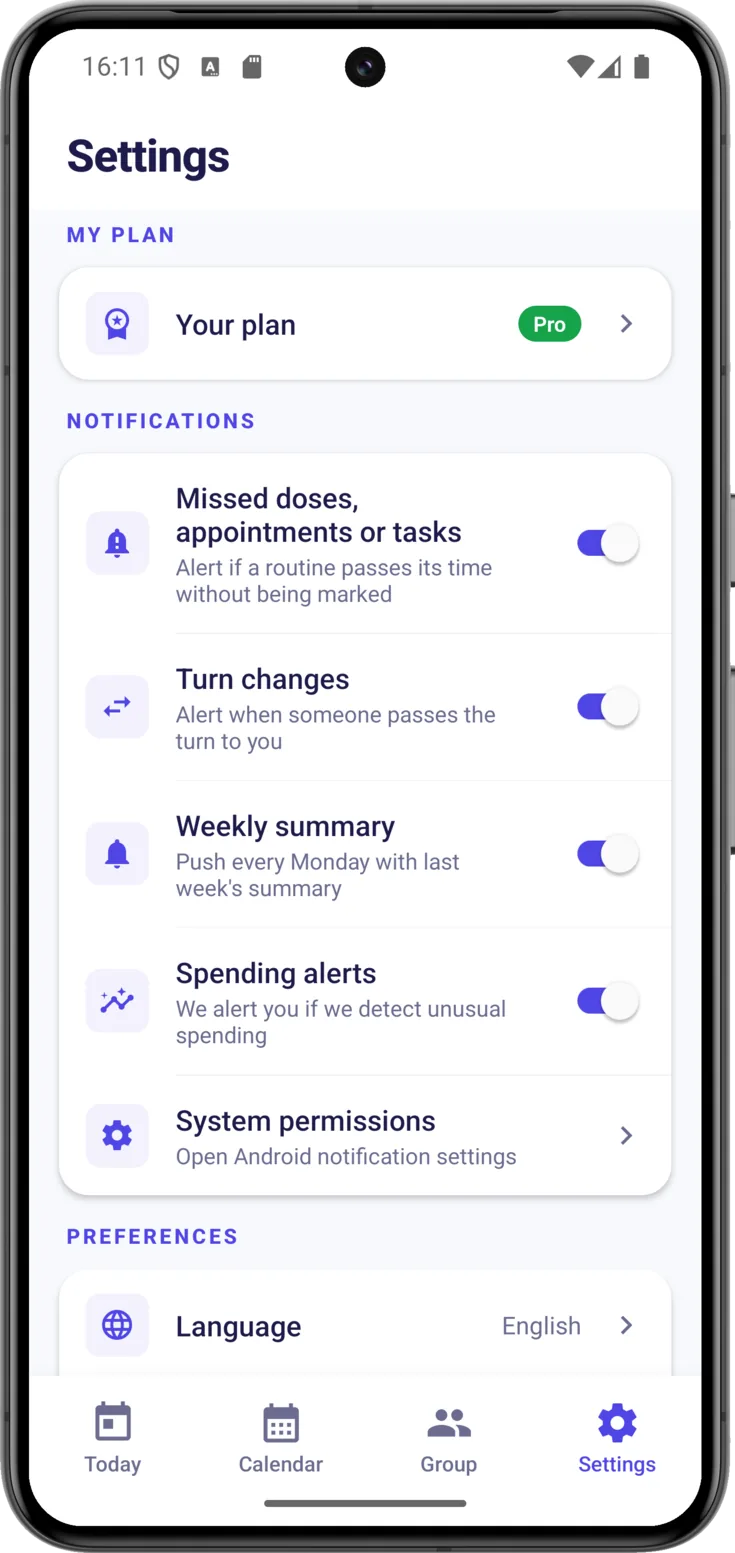
Here you choose what CarePilot alerts you about and what it doesn’t. Each alert is switched on and off separately, so you can leave on only the ones that are genuinely useful to you.
Choose which alerts to receive
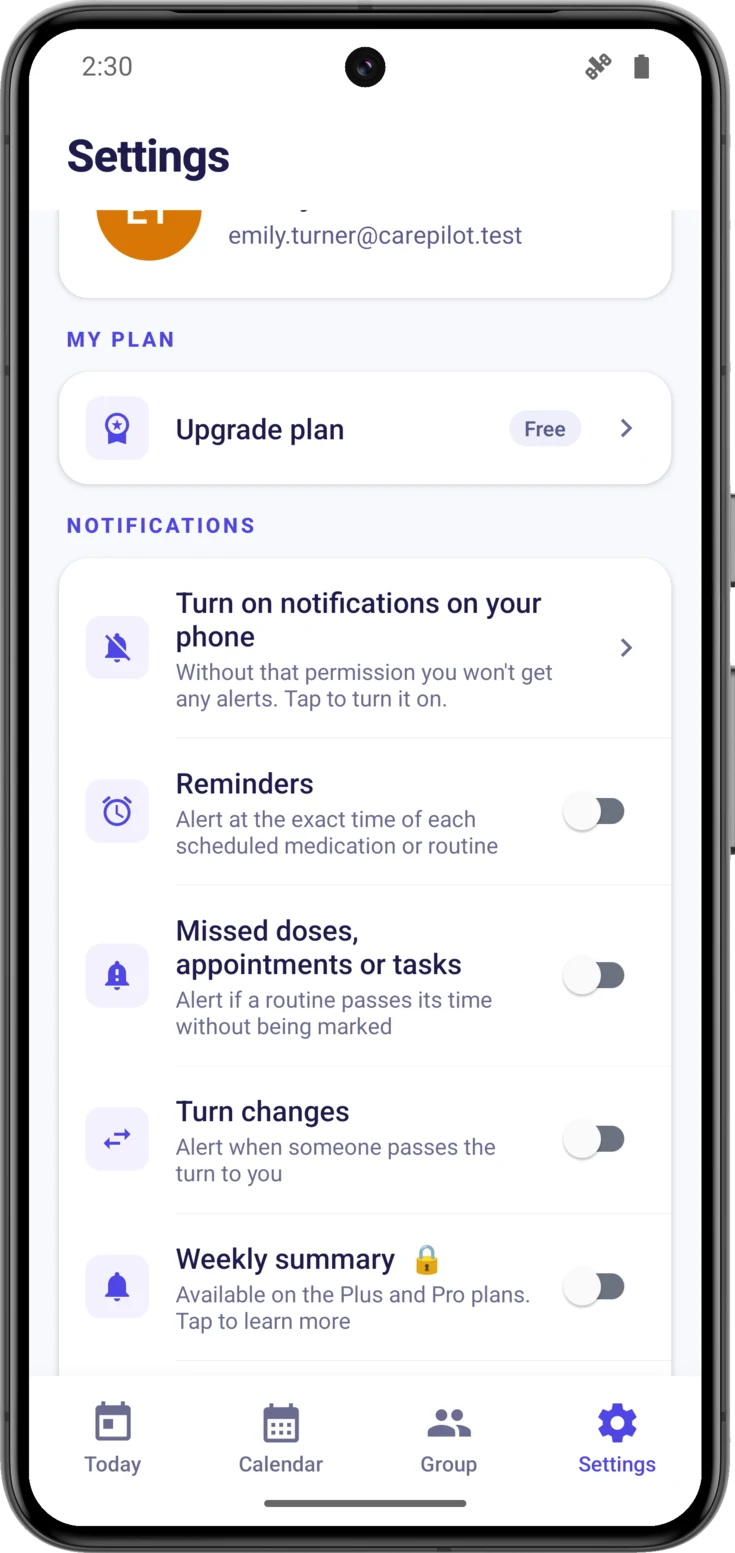
The first row, «Phone notification settings» , doesn’t switch any alert on or off: it takes you to the phone’s own settings, which is where it is decided whether they make a sound, whether they vibrate and how they look.
Below that come the switches:
- Reminders — it alerts you when it is due, right on the hour of each medication or routine. It comes switched on.
- Missed doses, appointments or tasks — the other side of things: it alerts you when the time has already passed and it still hasn’t been marked. One reminds you in time and the other rescues you if it got away from you.
- Turn changes — when somebody hands the watch over to you.
- Weekly summary — every Monday, how the week went. It only appears if you organize a group, because that is who it goes to.
- Spending alerts — it alerts you if expenses shoot up.
If no alerts reach you at all
It is almost always the same thing: the phone has CarePilot’s alerts blocked, which is something separate from these switches.
You recognise it because the first row changes on its own and starts saying «Turn on notifications on your phone», with the switches below it off and greyed out. They are not broken and it isn’t a fault: turning them on would achieve nothing while the phone is not letting CarePilot’s alerts through.
Tap that row, which takes you to the system settings. When you come back, the switches reactivate on their own with whatever you had set.
Android
You land on CarePilot’s page inside the Android settings, with the list of alert categories. There you allow them and, while you are at it, adjust the sound and the vibration of each type.
iPhone
You land on Settings → Apps → CarePilot, and there you have to go into «Notifications» —one step more than on Android— to turn them on. On that same screen you’ll find the app’s preferred language, in case one day you want to change it for CarePilot only.
Preferences
Small day-to-day details. None of this is compulsory: they are conveniences.
Language, currency, time and view
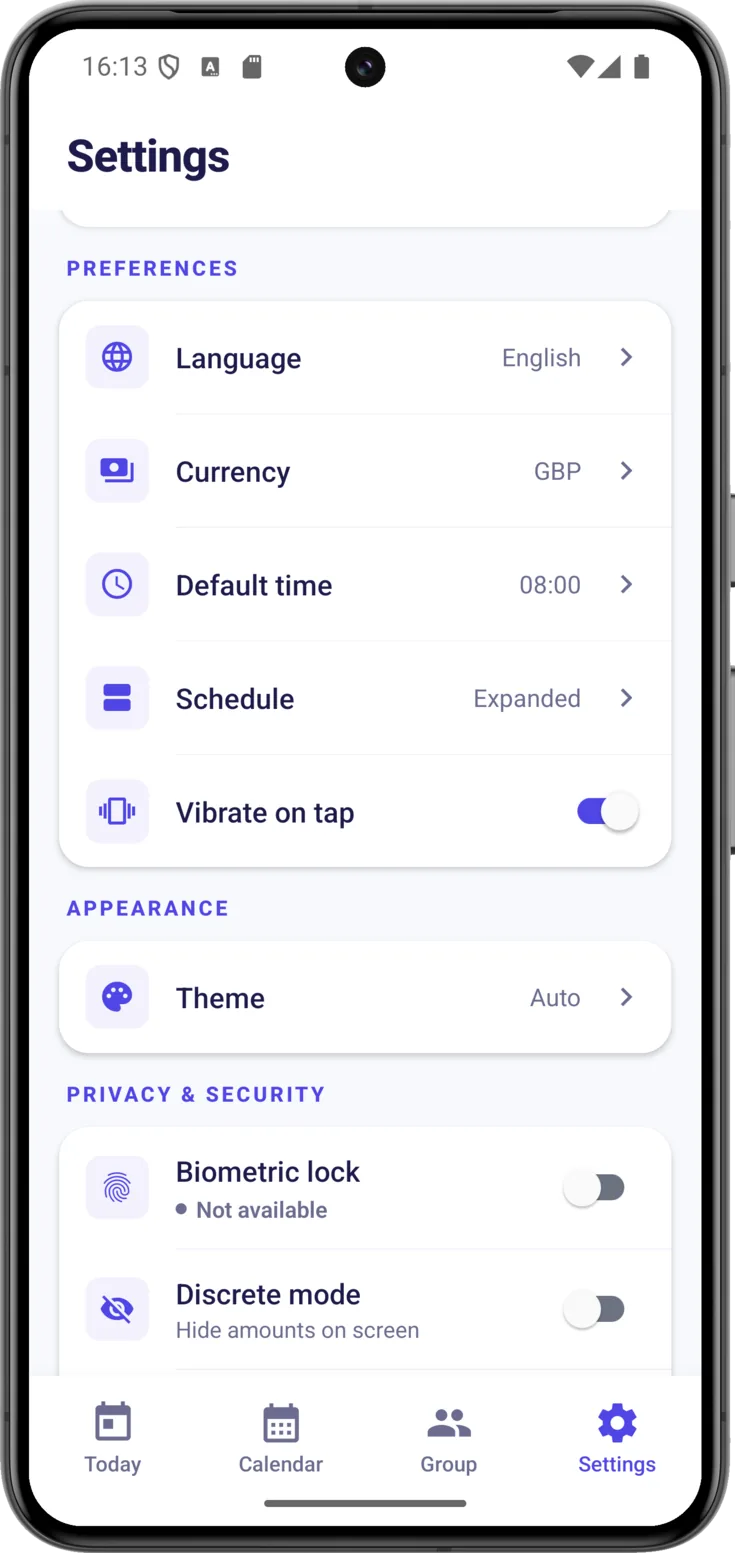
- «Language» — CarePilot speaks 6 languages; here you choose which one you want to see the whole app in. Which ones they are is in the frequently asked questions.
- «Currency» — the currency of the expenses. Every new group is born with the one you have set here; the ones that already exist keep theirs. It is explained in Expenses.
- «Default time» — the one the app offers you already filled in when you create a medication, to save you setting it every time.
- «Schedule» — how the cards look on Today: Compact, which fits more at a glance, or Expanded, bigger and with more detail.
- «Vibrate on tap» — that little tremor when you press the buttons. If it bothers you, you turn it off.
Appearance
Choose the theme
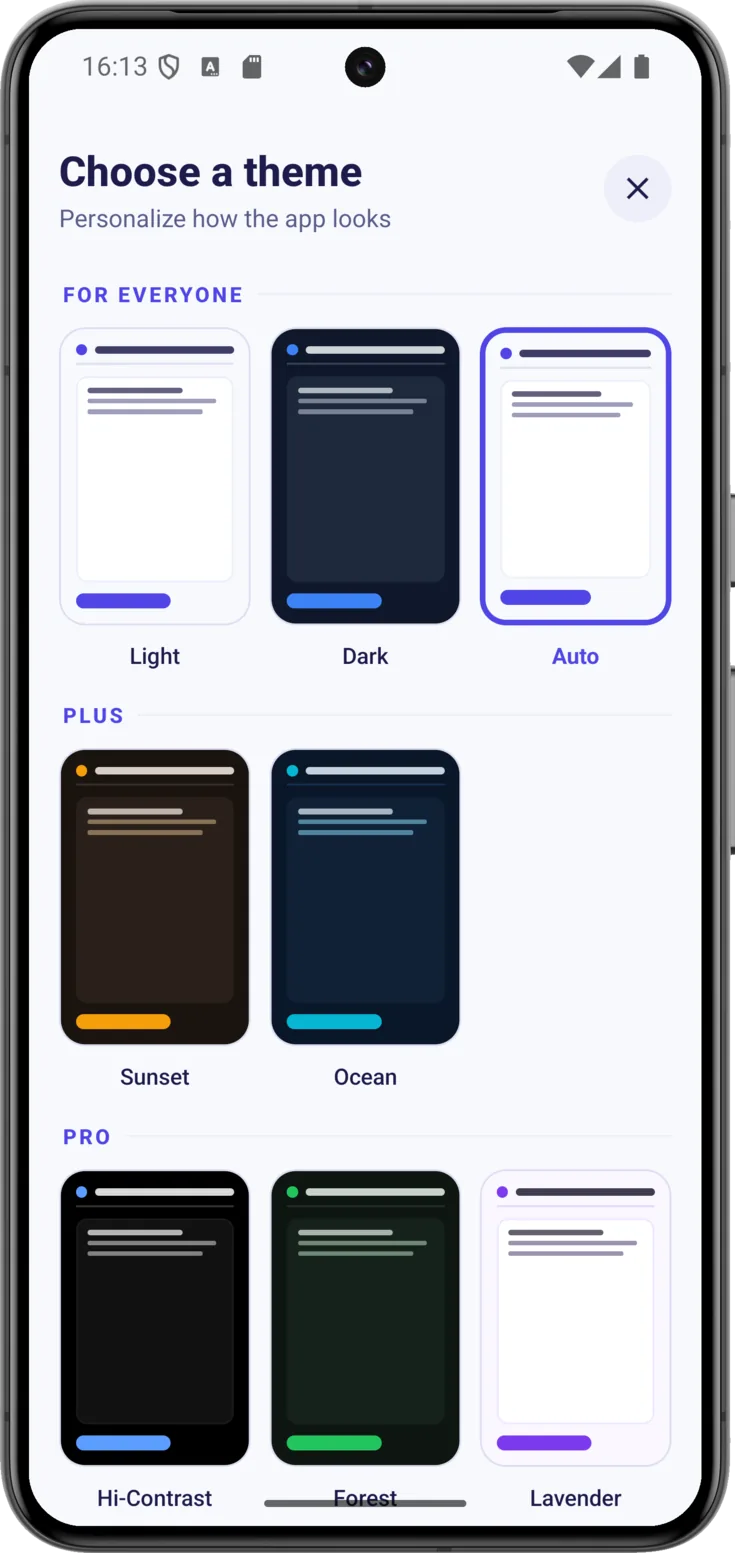
In «Theme» there are 9 colour themes plus Auto mode. Some are free and others come with the paid plans.
The screen groups them by plan on its own: under For everyone are Light, Dark and Auto, which follows your phone and turns the app light by day and dark by night; under Plus, Sunset and Ocean; and under Pro, Hi-Contrast, Forest, Lavender, Aurora and Mocha.
If you find the screen hard to read, Hi-Contrast is designed for exactly that: very bold lettering and colours.
Privacy and security
Here you protect both the way into the app and the keys that open your data. Some of these options are your safety net if one day you lose your phone.
Protect the app and your keys
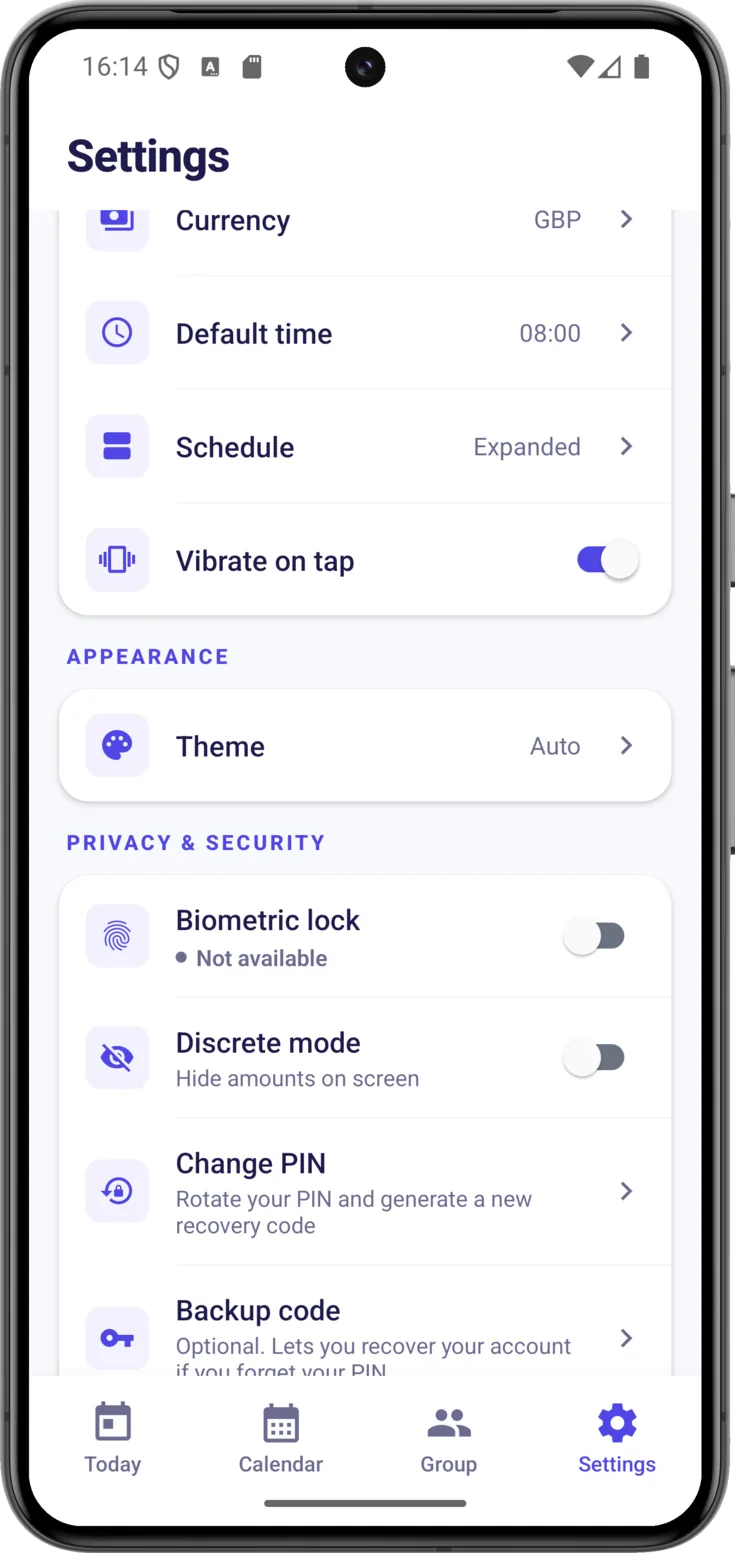
- «Biometric lock» — the app asks for your fingerprint or your face when you open it and also every time you come back to it after leaving it in the background, even if you only stepped away for a few seconds to look at a message. Just like the bank does. Underneath the name there is a tag: «Available» in green if your phone has them set up, or «Not available» in grey if it doesn’t. With «Not available» the switch won’t let you turn it on, and that isn’t a fault: you first have to register the fingerprint or the face in the phone’s settings.
- «Discrete mode» — it hides the amounts on the screen. Handy in the waiting room or on the bus.
- «Change PIN» — it changes your recovery PIN, the one that gives you your data back when you change phones. Change it if you think somebody has seen it.
- «Backup code» — it generates the emergency key that saves you if you forget your PIN. You keep it somewhere safe and hope you never need it, but it is the difference between recovering your data and losing it.
Legal information
The legal information
The three rows in this block —«Privacy policy» , «Terms of use» and «How to delete my data» — don’t change anything in the app: they open the official texts on the website, always in your language. The first two are the usual legal documents. The third is the one that matters to you if you want to erase your information, because it explains the whole process and it also offers a route by email if you would rather ask for it in writing.
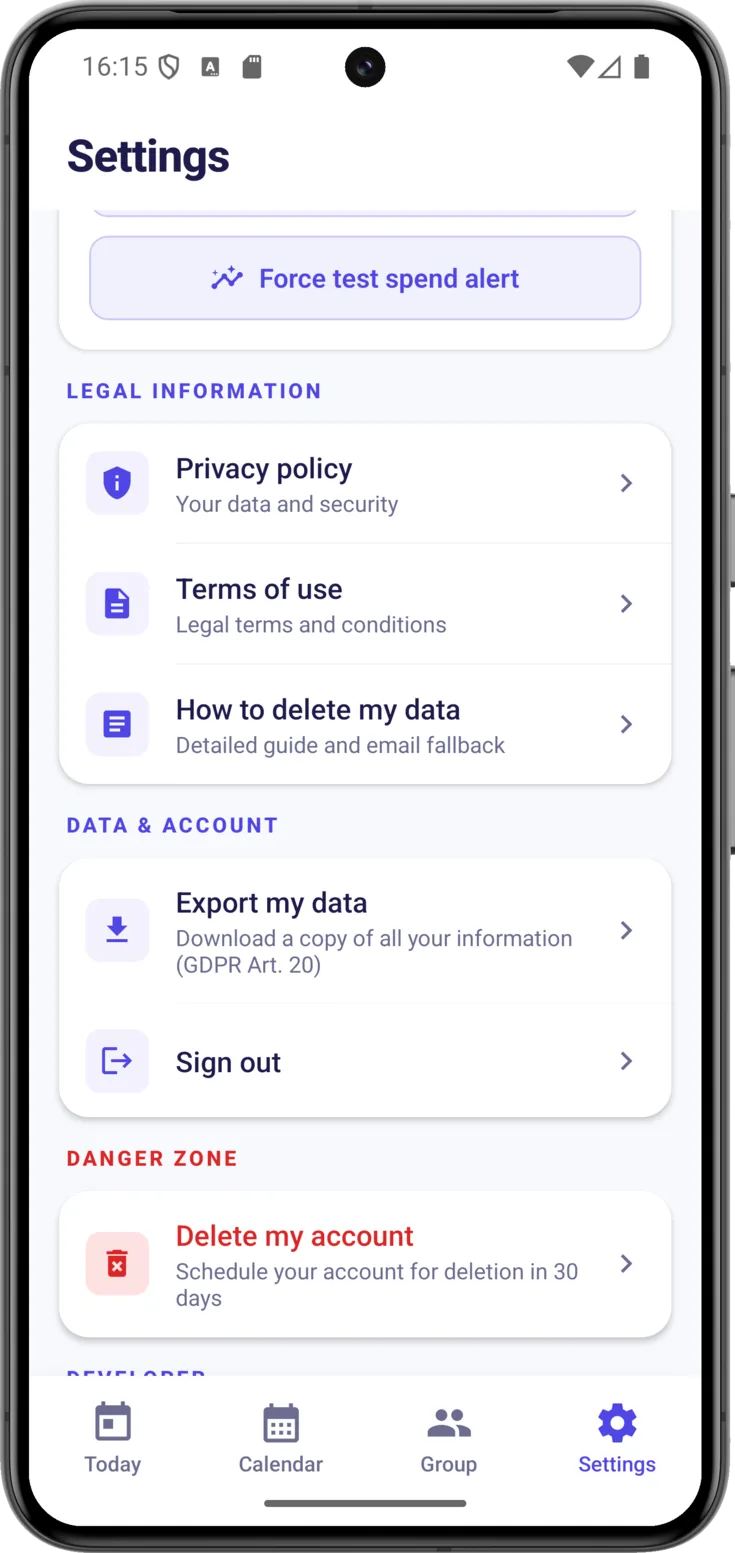
Data and account
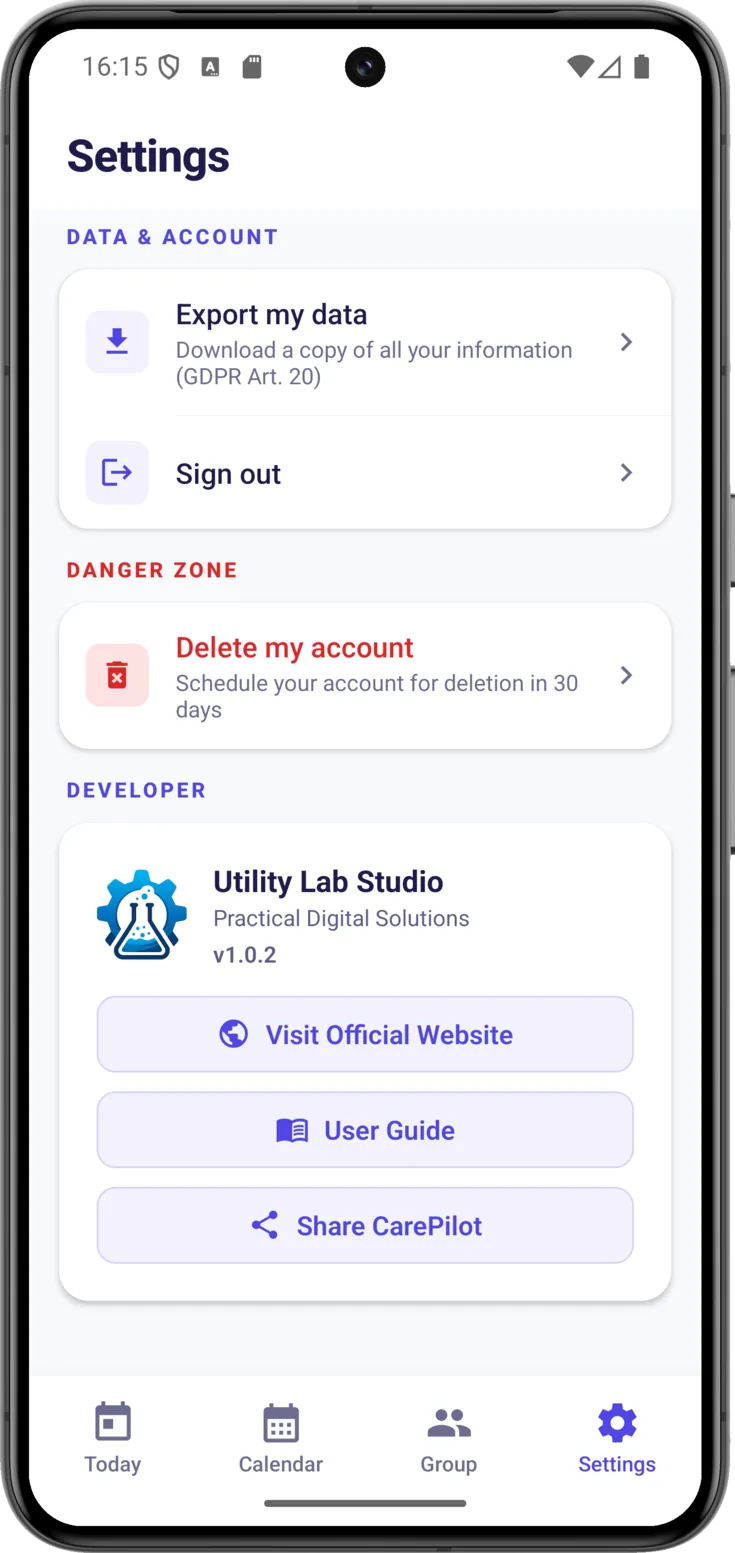
This is where the most serious actions are, and that is why they are grouped together: taking a copy with you, signing out or deleting the account.
Export, sign out or delete the account
- «Export my data» , the row that sits just above «Sign out» — it downloads a copy of your information; asking for it is a right that the data protection law gives you. You choose what to take with you: a readable PDF, a JSON with the same thing in a technical format, the images or everything together. If you tick several things, it arrives in a single compressed file.
- The images are only offered if you organize a group. They may contain health data about the person being cared for, and it is the organizer who answers for them.
- «Sign out» — you leave without deleting anything.
- In the danger zone, set apart so that you don’t tap it by accident, «Delete my account» deletes your account, with 30 days’ grace in case you have second thoughts.
Support, website and sharing
Write to us or share the app
Go all the way down, to the developer block. It has five buttons, and the one that matters when something goes wrong is «Technical support» , which is the way to write to us.
The other four are «Visit Official Website», «User Guide» —this very guide—, «Share CarePilot» and «Rate CarePilot», which opens the store page.