Instead of copying out by hand what a piece of paper says —a prescription, the letter for an appointment, the pharmacy receipt or a report—, you take a photo of it and the app recognizes what it is and fills in the data for you. You review it, correct anything that needs correcting, and save.
It recognizes four types: «Prescriptions», «Appointments», «Receipts» and «Reports», and depending on what it is, it turns it into a medication dose, an appointment, an expense or a document.
Where it is and how to get started
Open the scanner
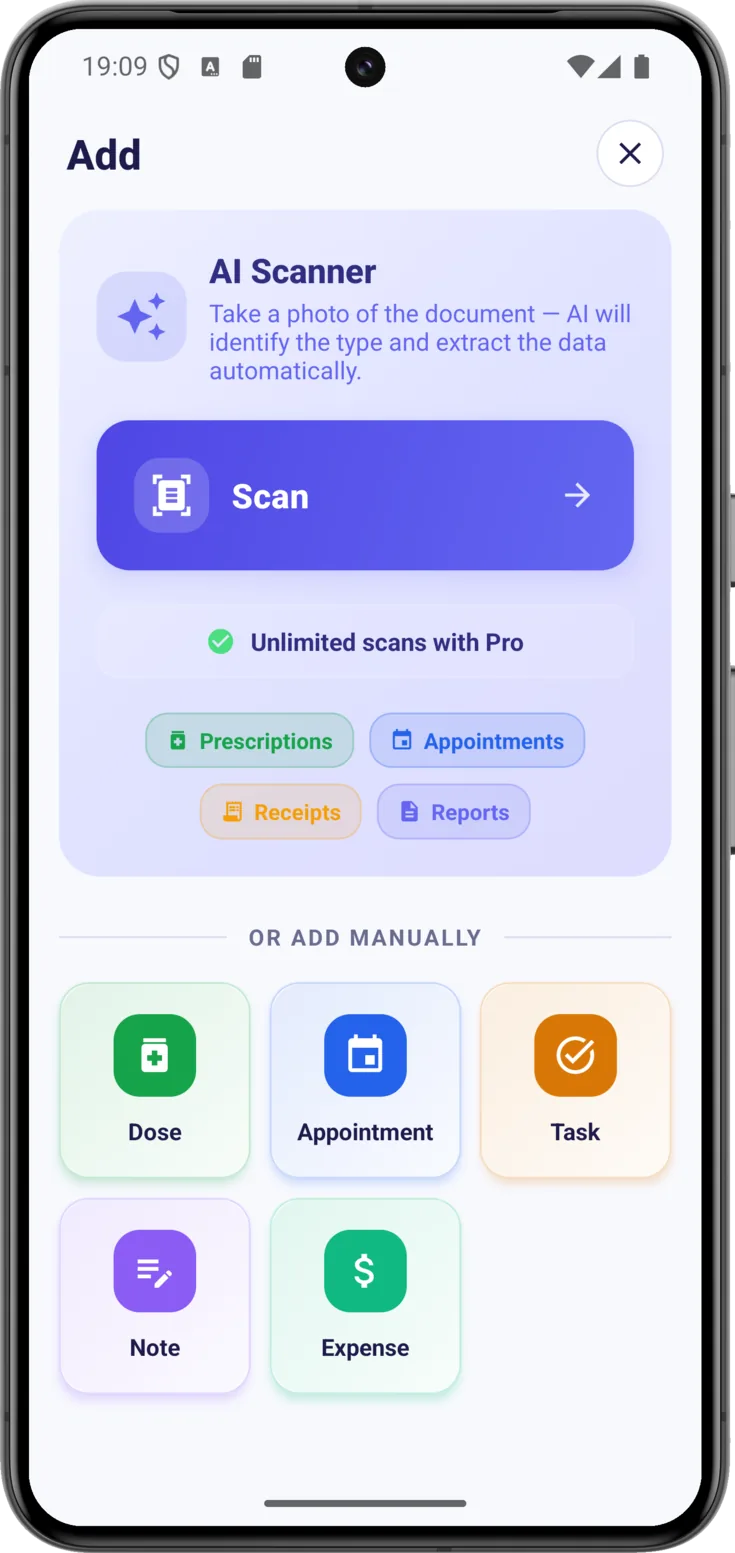
Tap the button at the bottom right of Today and at the top you will see the «AI Scanner» block with the «Scan» button .
Underneath the button you will see how many scans you have left. And if you would rather not use any, that same screen has the buttons to add it by hand: a dose, an appointment, a task, a note or an expense.
Take the photo of the document
Place the document on a flat, well-lit surface and frame it: the app detects the edges of the paper on its own.
From here on, the screen is no longer CarePilot’s: it is the phone’s own scanner, and Android and iPhone do not do it the same way. Pick yours.
Android
Frame and capture
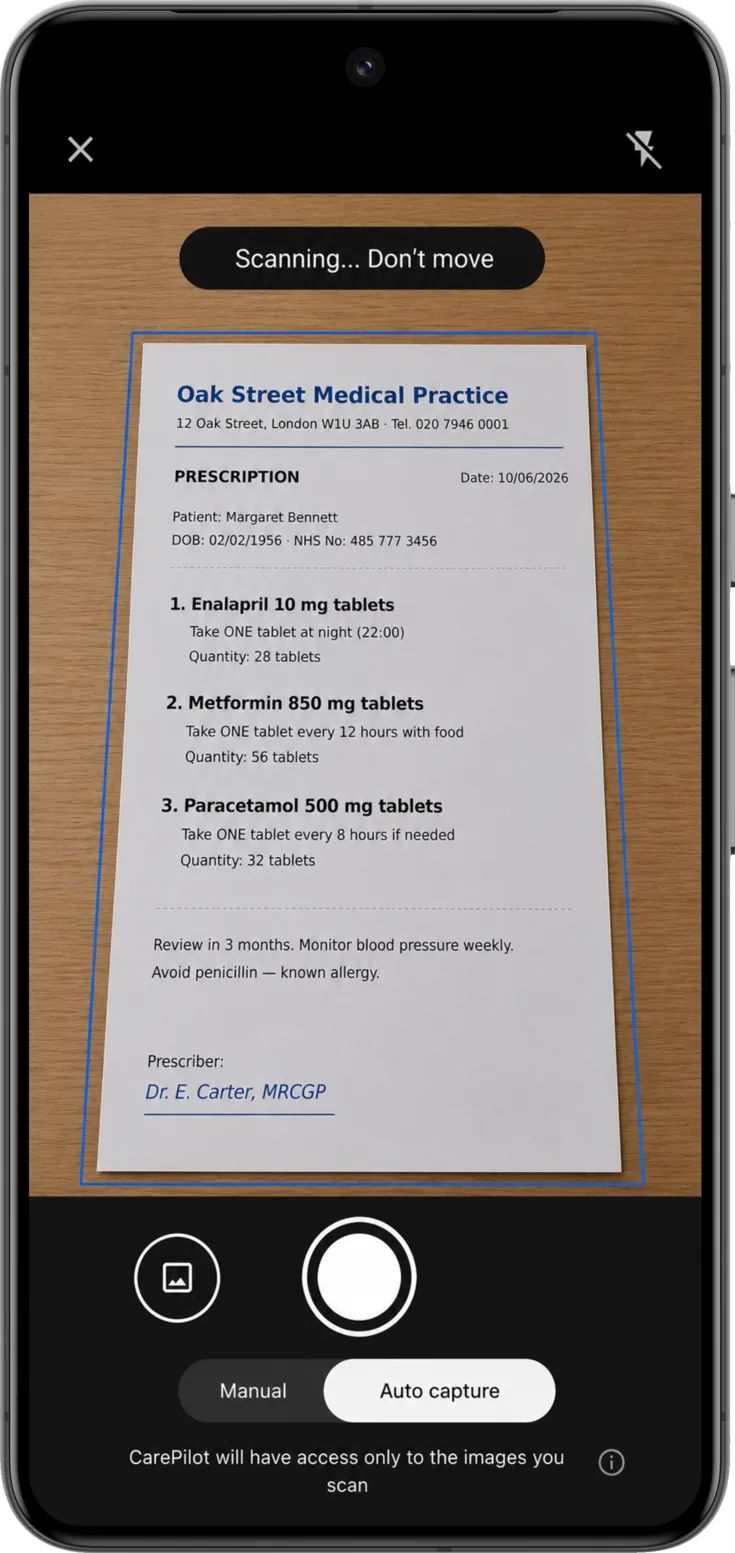
«Auto capture» comes switched on, and it is what works best with almost any document: the app looks for the edges of the paper, adjusts the frame and, as soon as it fits and you hold the phone still, it takes the shot by itself. While it does so it warns you with «Scanning… Hold still», and along the way it straightens the image and corrects the angle.
Switch to «Manual» if you would rather decide the moment yourself, or if the frame will not quite settle: it then fires with the round button in the middle.
Use the gallery button , to the left of the shutter, when you already have the photo on your phone and do not want to take it again.
Add any missing pages and adjust the image
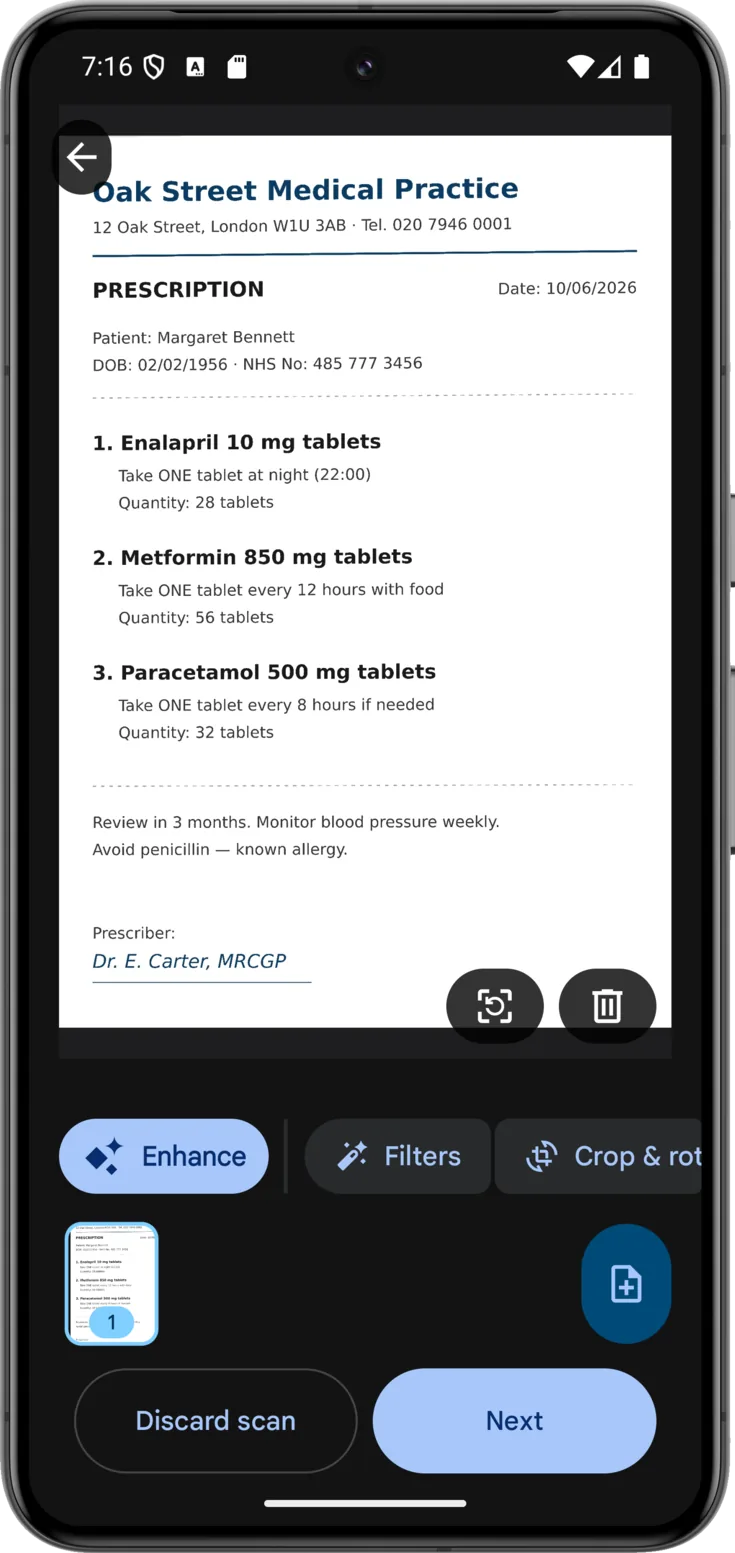
Add any missing sheets with the button if the document has several pages: they are all saved together.
Fine-tune the image if you like, although you do not need to touch anything because it already comes with the improvements applied: «Crop & rotate» if it caught part of the table or came out crooked, and «Enhance» and «Filters» so the text reads better.
When it looks right to you, «Next». If it is no good, «Discard scan» takes you back to the camera without saving anything.
iPhone
Frame and capture
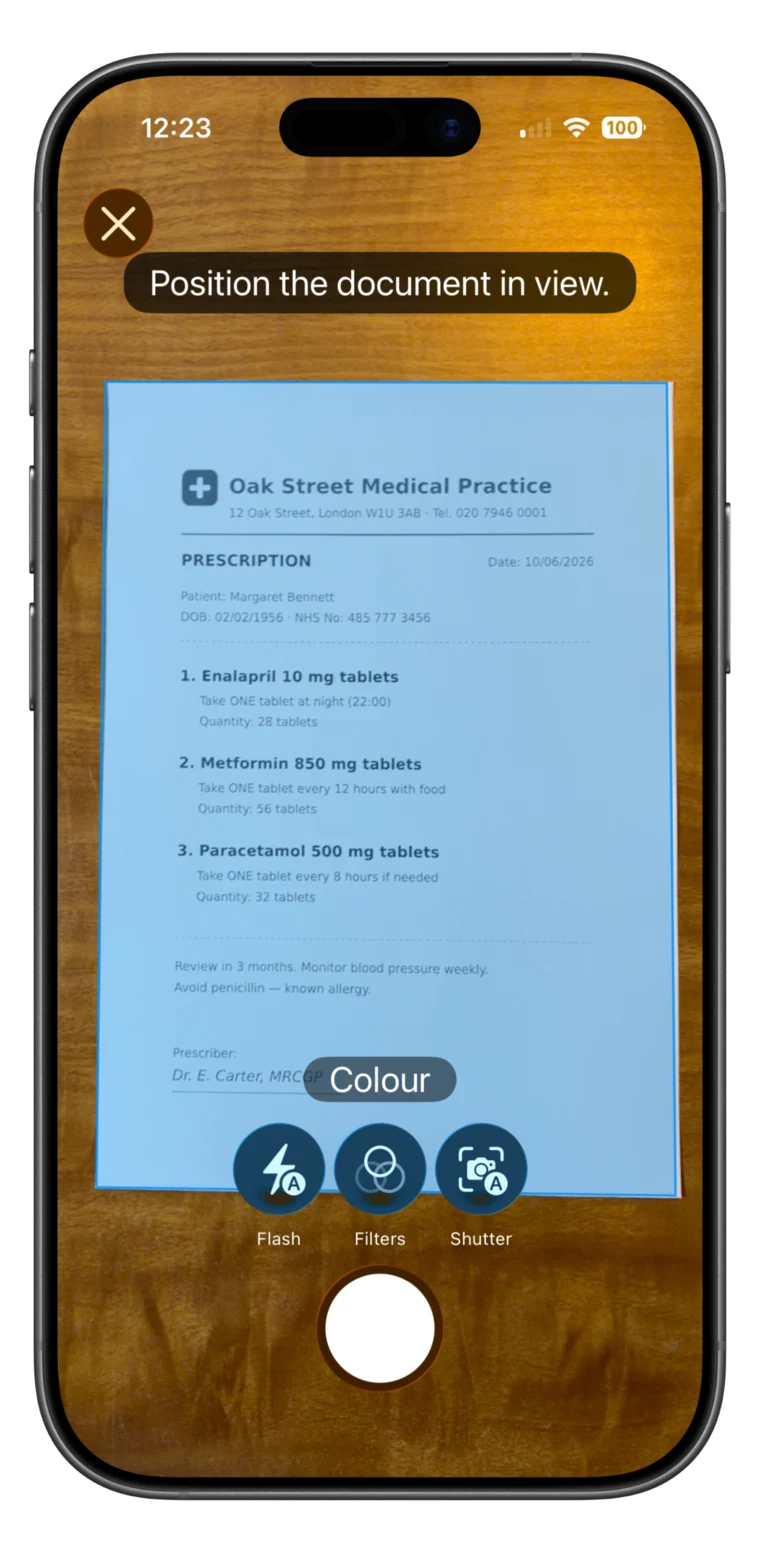
On iPhone the scanner fires on its own: you will see «Position the document in view.» and, as soon as the paper is framed and you hold the phone still, it takes the photo. It also straightens the image and corrects the angle.
There are three controls at the bottom; the ones with a small «A» are on automatic:
- «Flash», for documents in low light.
- «Filters», between color, grayscale and black and white.
- «Shutter», which switches between automatic and manual capture.
Check the page and retake it if needed
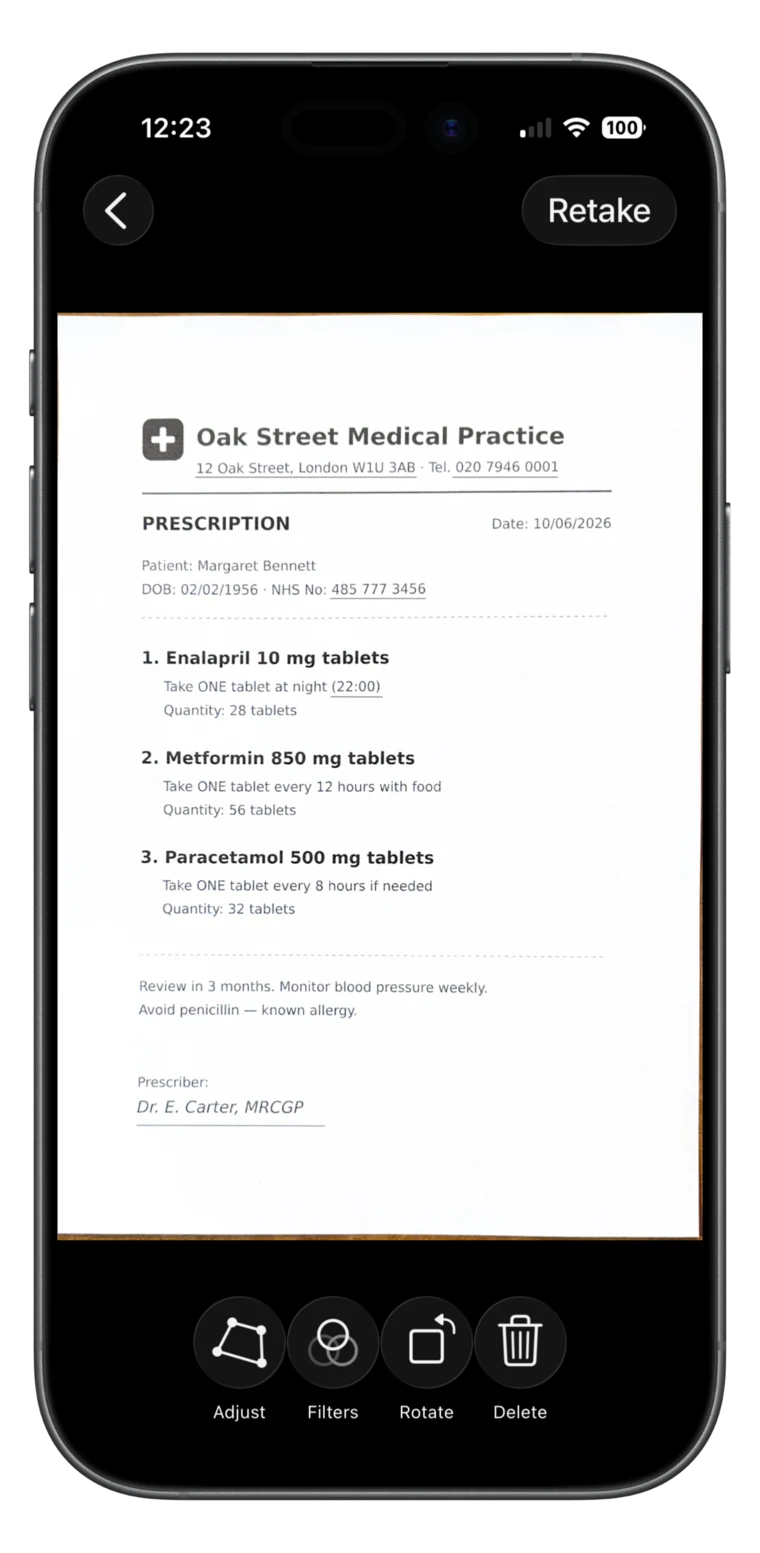
Check the page: after each photo the iPhone shows it to you before going on. If it did not come out well, «Retake» at the top right takes it again.
At the bottom there are four adjustments, each with its name under the icon: «Adjust» moves the four corners by hand when the crop has eaten part of the paper, «Filters» changes the color so the text reads better, «Rotate» straightens the page and «Delete» discards it.
If the document has several sheets, keep photographing: they are saved together as a single document.
Review the data the AI has filled in
The AI reads the paper and fills in the data, but the last word is yours.
Wait a few seconds while it analyzes
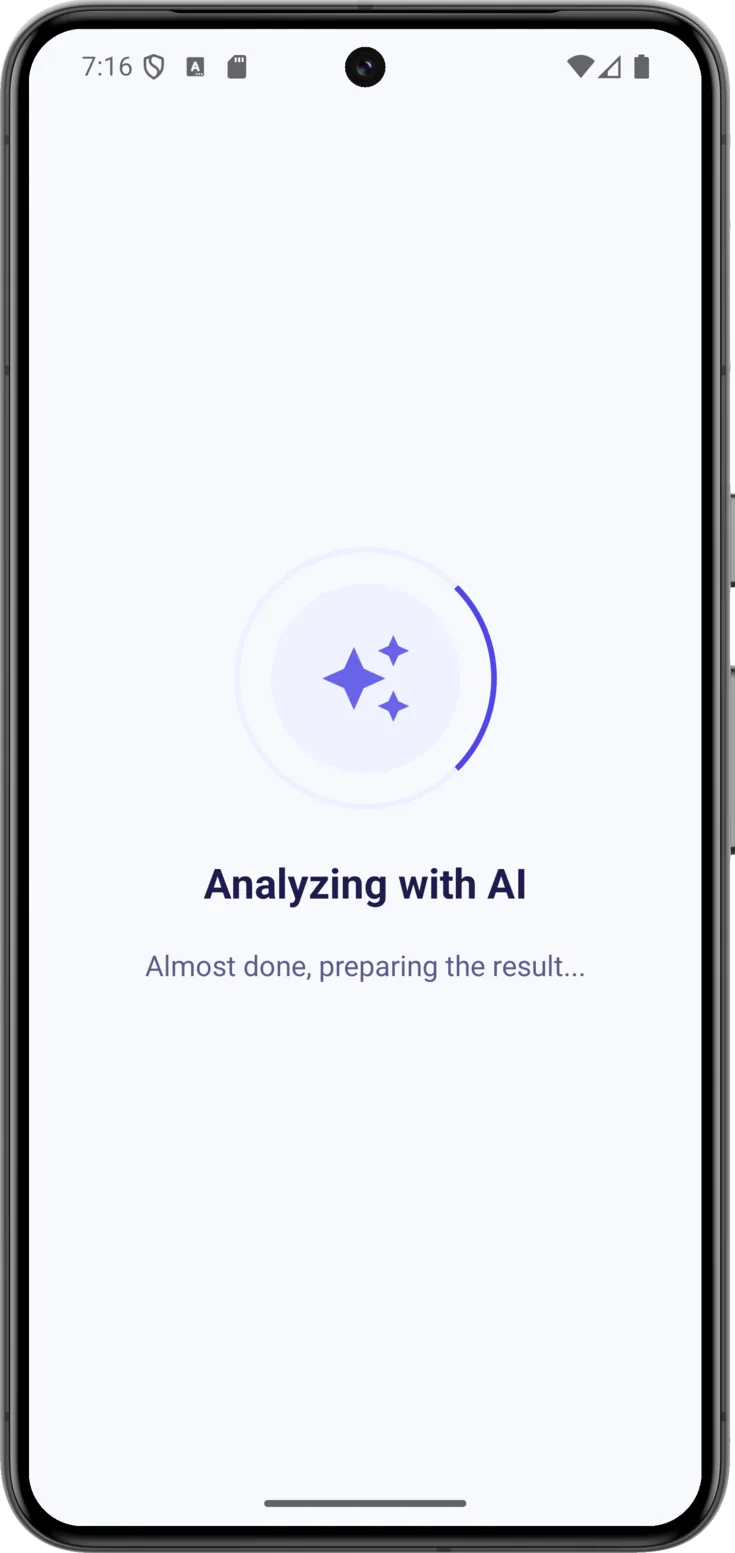
There is nothing to do here but wait: the app sends the photo and the AI reads the document. It takes a few seconds —you will see «Analyzing with AI»— and as soon as it finishes the form opens already filled in.
Check and correct before saving
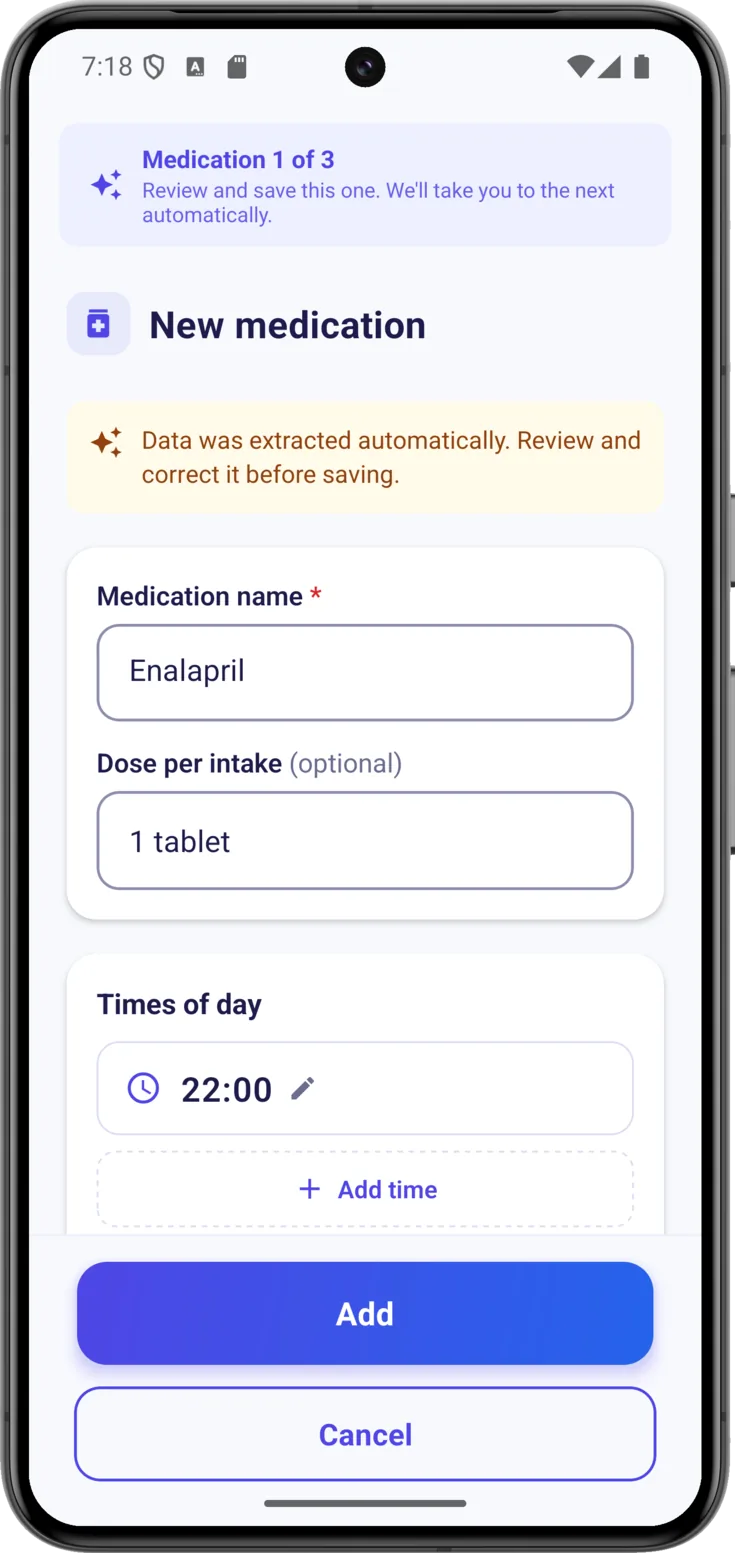
A notice reminds you: «Data was extracted automatically. Review and correct it before saving.» Go over each field —the medication name, the dose, the times, the appointment date— and correct anything that did not come out exact. Then, «Add».
If one paper contains several things, such as a prescription with three medications, the app tells you so —«Medication 1 of 3»— and takes you through them one by one, so nothing goes unrecorded.
If it tells you this is not a care document
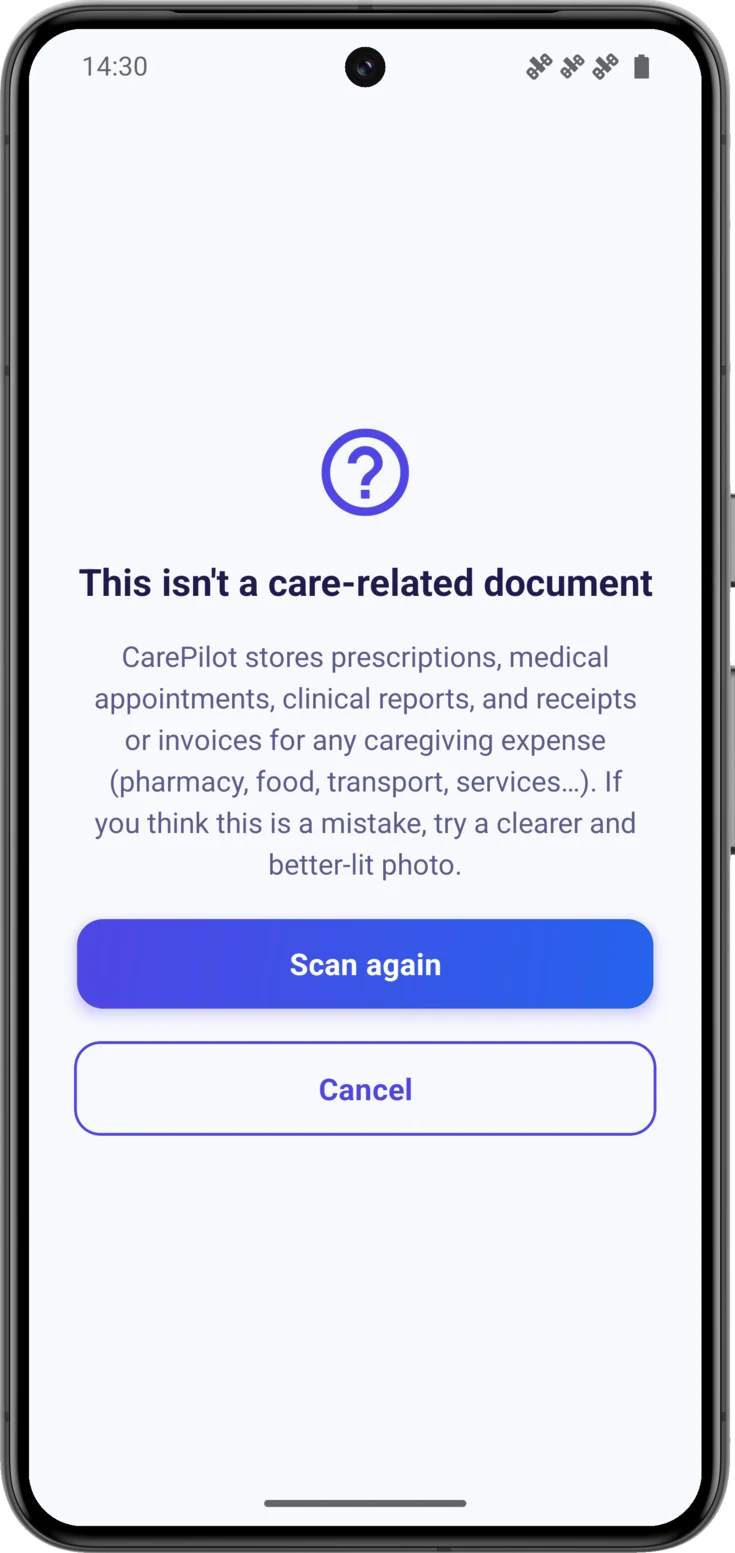
Sometimes «This isn’t a care-related document» appears, and it is worth telling the two reasons apart.
If the paper really is not one of the kinds the app handles —a menu, a leaflet, a letter from the bank—, that is the right answer. The screen reminds you what it does keep: prescriptions, medical appointments, clinical reports and receipts or invoices for care.
But if it was one of them, it is nearly always down to the photo: too little light, a shadow across it, the paper crooked or too far away. «Scan again» and take it again more carefully; «Cancel» leaves without saving. And if your connection is not good, try later: scanning needs the internet.
How many scans you can do
There is a difference here from the rest of the app that is worth being clear about. Almost every limit —how many medications, how many notes, how much history— is set by the plan of whoever organizes the group. Scans are not: they are yours. They count against your own plan and come out of the same pot whichever group you use them in, so on Free you have your three trial scans even if the group is organized by someone on Plus or Pro. Plans are covered in Plans and subscriptions.
A bar inside the scanner tells you how many you have left —«0 of 3 scans (free trial)»—, so it does not catch you by surprise. And it is worth knowing before you start: each scan is deducted when the photo is processed, even if you save nothing afterwards, so look the image over before sending it to the AI.
| Free | Plus | Pro | |
|---|---|---|---|
| AI scans | 3 in total (trial) | 30 per month | Unlimited |
On Plus the counter renews every month —the app reminds you with «Resets on day 1.»— and on Free it is 3 scans in total, to try it out.
Watch out for one difference that catches people out: in CarePilot almost every limit is the one belonging to the plan of whoever organizes the group, but scans are yours. Your own plan is what counts, whichever group you spend them in: even if the group is organized by someone on Plus or Pro, if you are on Free you have your three trial scans and no more. Who pays for what is explained in Plans and subscriptions.
With the photo of the paper it works exactly the other way round, and it is worth being clear about it because both things happen in the same gesture. Whether that image is kept or not is not decided by your plan, but by the group’s, that is, by the plan of the person who organizes it, because the image is stored in the group’s space and that space is paid for by that person. It can happen that you are on Plus and you scan in a group organized by someone on Free: the scan is deducted from your account all the same, and the photo is not kept.
What you see when they run out
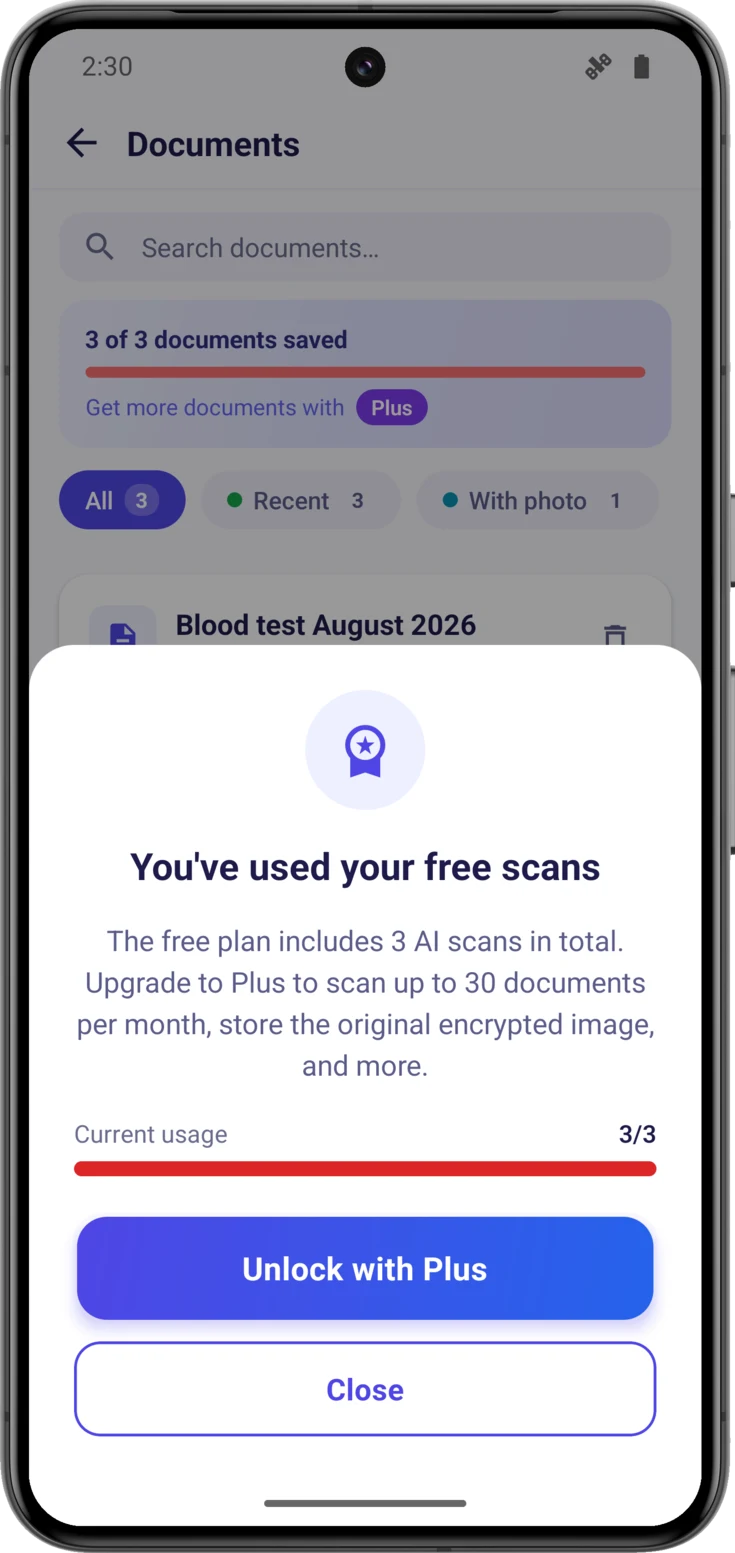
When you try to scan, the camera no longer opens: «You’ve used your free scans» appears, with what each plan includes and a red bar with «Current usage» —3/3—.
Two buttons: «Unlock with Plus», which takes you to the plans, and «Close». The app has not been blocked and you have not lost anything: you can carry on adding things by hand, with the same result.